Woodworking, an age-old craft that has stood the test of time, finds its essence in the artful use of hand tools. In an era where mechanization often takes center stage, the significance of woodworking hand tools in woodworking cannot be overstated. These time-honored instruments are the bedrock of craftsmanship, embodying a level of precision and finesse that is unmatched.
The Art of Precision
At the heart of every woodworking project lies the pursuit of exactitude. Hand tools, with their tactile nature and fine maneuverability, allow artisans to achieve a level of precision that machines, with their inherent limitations, often struggle to replicate. Whether it’s the deft strokes of a finely honed chisel or the meticulous guidance of a handsaw, the craftsman’s touch is an irreplaceable element in the pursuit of perfection.
A Symphony of Selection
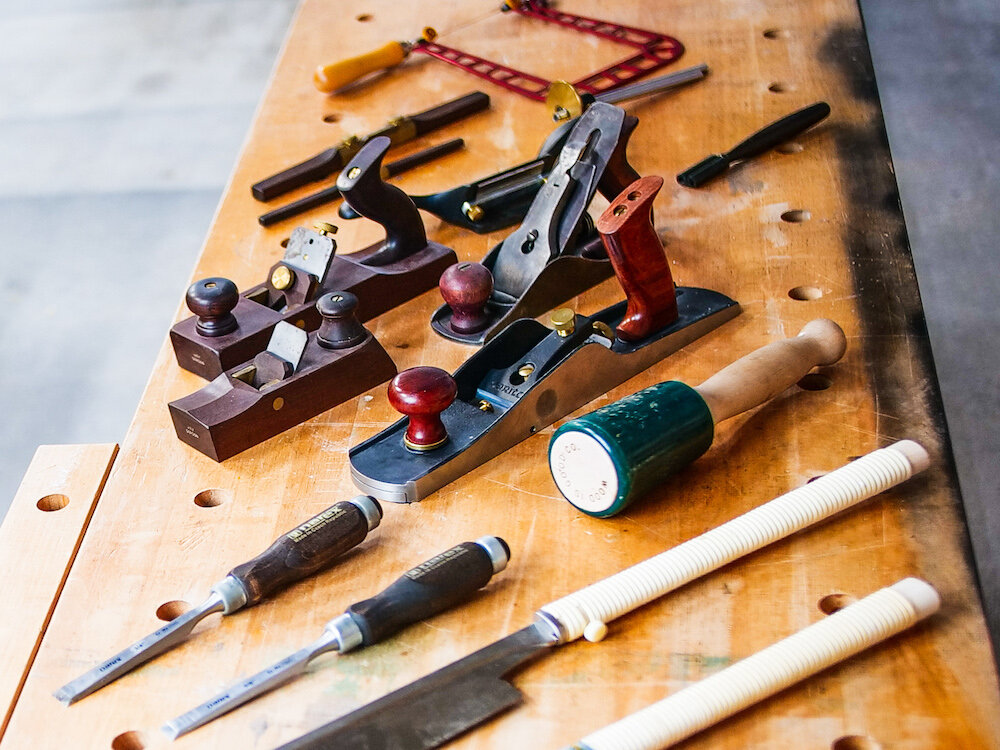
The world of woodworking hand tools encompasses a rich and diverse array of instruments, each meticulously designed to serve a distinct purpose. From the steadfast reliability of a well-crafted plane to the intricate precision of carving tools, the range of hand tools available is as extensive as the creativity they inspire. Whether one’s endeavor calls for the finesse of a delicate marking gauge or the raw power of a well-balanced mallet, there exists a tool finely attuned to the task at hand.
Essential Hand Tools for Every Woodworker
Chisels

Chisels are fundamental hand tools in woodworking, serving a variety of purposes. Understanding the different types of chisels and how to use them effectively is crucial for any woodworker.
Types of Chisels
- Bench Chisels: These are the most versatile and commonly used chisels. They come in various sizes and are suitable for a wide range of tasks, including shaping, carving, and paring.
- Mortise Chisels: Designed specifically for cutting mortises, these chisels are sturdy and have thick, straight blades to handle the rigors of mortise work.
- Paring Chisels: With long, thin blades, paring chisels excel at delicate and precise work, such as fitting joints or shaping intricate details.
Choosing the Right Chisel
When selecting a chisel for a specific job, consider the following:
- Blade Material: High-quality steel provides better edge retention and durability. Look for chisels made from high-carbon or tool steel.
- Handle Design: A comfortable grip is essential for control and precision. Wood or composite handles are popular choices.
- Blade Size and Shape: Match the chisel size and shape to the task. Wider chisels are suitable for removing material, while narrower ones excel at detailed work.
Sharpening and Maintaining Chisels
A sharp chisel is essential for clean and precise woodworking. Follow these steps for effective sharpening and maintenance:
- Honing: Regularly hone the chisel using a sharpening stone or honing guide. This helps maintain the edge and prolongs the time between sharpening sessions.
- Sharpening: Use a sharpening stone or system to restore the chisel’s edge. Start with a coarse grit and progress to finer grits for a polished edge.
- Lapping the Back: Ensure the back of the chisel is flat and smooth. This improves the overall performance of the tool.
- Storage: Store chisels in a dedicated rack or pouch to prevent damage to the blade and protect the edge.
Hand Saws

Hand saws are indispensable for precise cutting in woodworking. Understanding the different types and their applications is essential for achieving accurate and clean results.
Types of Hand Saws
- Crosscut Saw: Designed for cutting across the grain of the wood, it features teeth that are angled to create clean, precise cuts.
- Rip Saw: Ideal for cutting along the grain, rip saws have fewer teeth per inch to quickly remove material.
- Dovetail Saw: With a thin blade and fine teeth, dovetail saws are designed for intricate joinery work, such as dovetail joints.
Proper Sawing Techniques
Achieving accurate cuts with a hand saw requires the right technique:
- Stance and Posture: Stand firmly with your feet shoulder-width apart and maintain a steady, controlled motion throughout the cut.
- Start and Finish: Begin the cut with light, controlled strokes, and increase pressure as the cut progresses. Finish with a controlled motion to prevent splintering.
- Guiding the Saw: Use your non-dominant hand to guide the saw along the intended line, maintaining steady pressure.
Planes
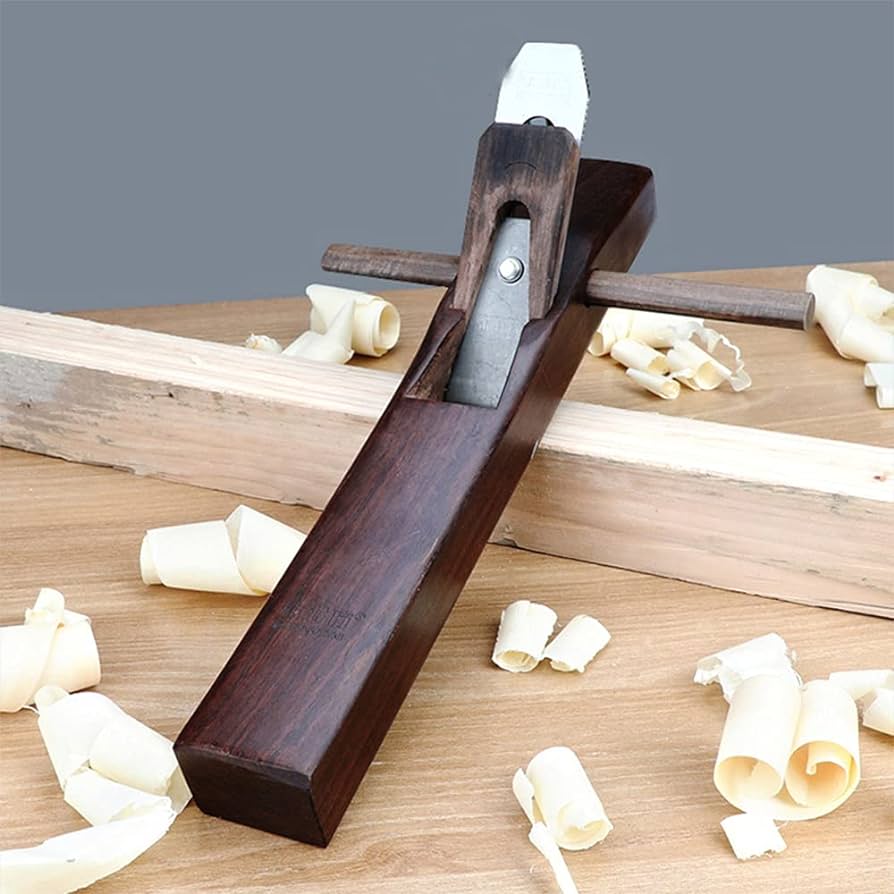
Planes are indispensable for refining and smoothing surfaces, making them essential tools in woodworking.
Types of Planes
- Smoothing Plane: Used for final surface finishing, it has a fine blade and is designed to leave a smooth, polished surface.
- Block Plane: Compact and versatile, block planes are suitable for trimming end grain, chamfering edges, and other small tasks.
- Jointer Plane: With a long sole, jointer planes are used for flattening and straightening longer boards.
Setting Up and Using Planes
To effectively use a plane, follow these steps:
- Blade Adjustment: Ensure the blade is set at the correct depth to achieve the desired cut. Make incremental adjustments until the desired result is achieved.
- Grain Direction: Always plane with the grain to prevent tear-out and achieve a smooth finish.
- Maintain a Flat Sole: Regularly check and maintain the flatness of the plane’s sole to ensure even and consistent results.
- Proper Holding Technique: Hold the plane with a firm but not overly tight grip, and maintain a consistent, controlled motion.
Sharpening and Adjusting Plane Blades
- Honing Guide: Use a honing guide to maintain a consistent angle when sharpening the plane blade.
- Lapping the Sole: Ensure the sole of the plane is flat and smooth to achieve consistent results.
- Adjustment Mechanism: Familiarize yourself with the adjustment mechanisms of your plane to fine-tune the blade for different tasks.
Specialized Hand Tools for Advanced Woodworking
Marking and Measuring Tools

In advanced woodworking, achieving precise and accurate measurements is paramount to the success of a project. This necessitates the use of specialized marking and measuring tools, which serve as the cornerstone of precision woodworking.
Introducing Marking Gauges, Measuring Tapes, Squares, etc.
Marking gauges, measuring tapes, squares, and similar tools are indispensable instruments in the toolkit of an advanced woodworker. These instruments serve the crucial function of ensuring that every cut, joint, and dimension adheres to the intended specifications.
The Role of Marking and Measuring Tools in Precision Woodworking
Marking and measuring tools lay the foundation for precision in woodworking. Marking gauges, for instance, allow woodworkers to score lines accurately, ensuring that cuts are made with the utmost precision. Measuring tapes, on the other hand, enable accurate length and width assessments, ensuring a seamless fit of components. Additionally, squares play a pivotal role in guaranteeing the perpendicularity and alignment of joints, ensuring a structurally sound final product.
Tips for Achieving Accurate Measurements and Markings
- Calibration and Maintenance: Regularly verify and calibrate marking and measuring tools to ensure their accuracy. Damaged or worn-out tools should be promptly replaced or repaired.
- Consistency in Technique: Maintain a consistent technique while marking and measuring to minimize human error. This includes applying consistent pressure and ensuring the tool is properly aligned.
- Utilize Multiple References: Cross-verify measurements using different tools to ensure accuracy. For instance, use both a square and a measuring tape to confirm a right angle.
- Consider Wood Grain and Texture: Take into account the grain direction and texture of the wood when marking to ensure that cuts are made in the most favorable manner.
Carving Tools
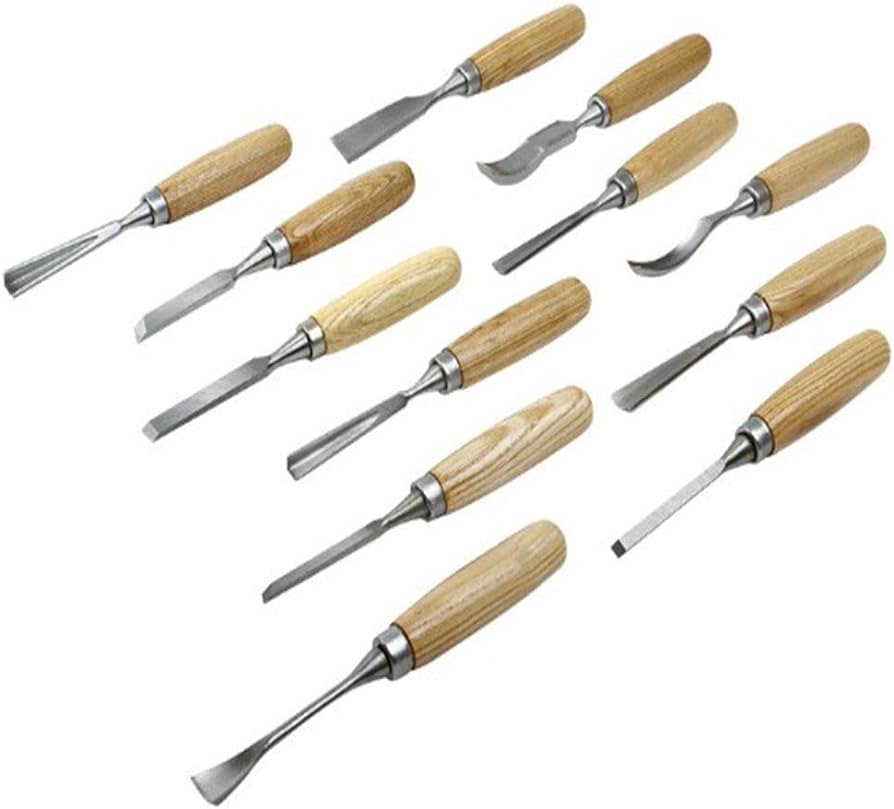
Carving tools are essential for the execution of intricate and detailed woodworking projects. Understanding the various types and applications of carving tools is imperative for achieving the level of intricacy demanded by advanced woodworking endeavors.
Overview of Carving Knives, Gouges, and Chisels
Carving tools encompass a range of instruments, including carving knives, gouges, and chisels. Each tool serves a distinct purpose in the carving process, allowing woodworkers to sculpt and refine wood with finesse.
Applications in Intricate Woodworking Projects
Carving tools find their niche in projects that require fine detailing and artistic expression. Whether it’s crafting ornate patterns, sculpting intricate figurines, or embellishing furniture pieces, carving tools provide the precision and control necessary for such endeavors.
Guidance on Safe Carving Techniques
- Secure Workpiece: Always secure the workpiece firmly before commencing any carving operation to prevent slips or unexpected movement.
- Maintain Sharp Blades: Sharp carving tools are essential for control and safety. Regularly sharpen and hone blades to ensure they remain in optimal condition.
- Work with the Grain: Carve in the direction of the wood grain to minimize the likelihood of splintering or tearing.
- Use a Mallet Appropriately: When using chisels or gouges with a mallet, ensure controlled and deliberate strikes to avoid over-penetration.
Files and Rasps
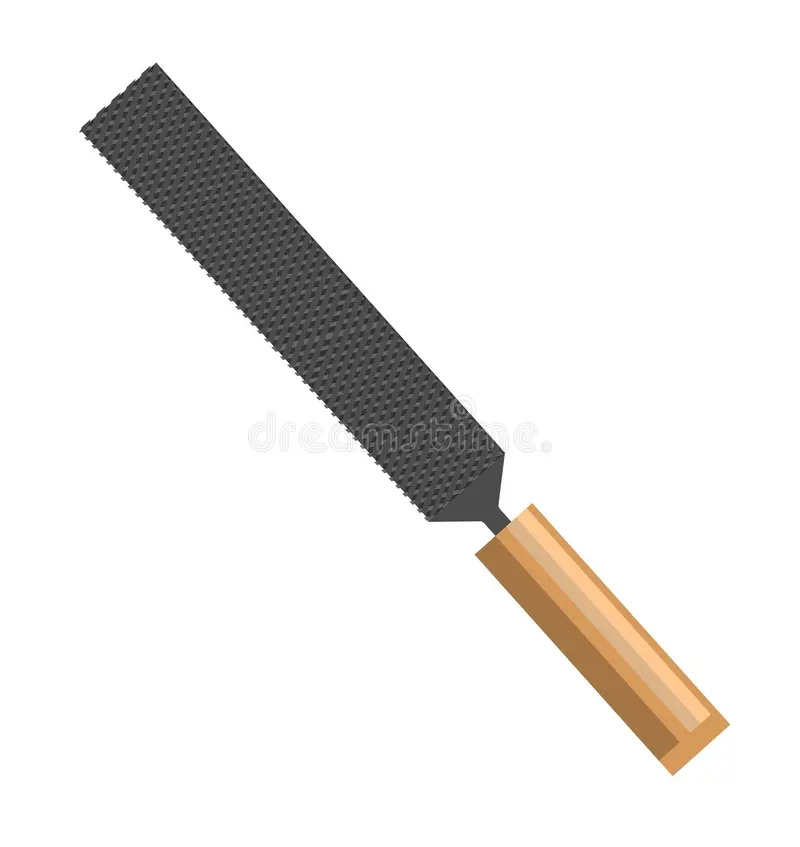
Files and rasps are indispensable tools for refining and shaping wood surfaces, offering a level of precision and control that is unparalleled. Understanding their distinctions and proper utilization is essential for achieving professional-grade finishes.
Differentiating Files and Rasps
Files and rasps, though similar in function, exhibit distinct characteristics. Files typically have finer teeth and are employed for finer finishing, while rasps possess coarser teeth, making them apt for rapid material removal.
Shaping and Smoothing Wood Surfaces
Files and rasps are invaluable in the shaping and smoothing of wood surfaces, allowing woodworkers to sculpt contours, refine edges, and eliminate imperfections with precision.
Tips for Selecting the Appropriate File or Rasp
- Consider Teeth Configuration: Select a file or rasp with an appropriate tooth pattern for the task at hand. Coarser teeth for rapid material removal, and finer teeth for finishing.
- Choose the Right Size and Shape: Opt for a file or rasp that matches the contour and dimensions of the surface to be worked on, ensuring optimal results.
- Quality and Material: Invest in high-quality files and rasps made from hardened steel to ensure longevity and consistent performance.
- Regular Cleaning and Maintenance: Clean files and rasps regularly to prevent clogging and maintain their cutting efficiency.
Safety and Maintenance Tips
Importance of Safety Gear:
In woodworking, prioritizing safety is paramount. This begins with the proper utilization of safety gear. Three critical components stand out: safety goggles, ear protection, and dust masks.
Safety Goggles: Safety goggles serve as a crucial barrier between the eyes and potential hazards. Woodworking operations can generate flying debris, splinters, and even fine particles from sanding. To safeguard vision, opt for impact-resistant goggles that provide a secure fit around the eyes.
Ear Protection: Woodworking environments are often noisy due to machinery and tools in operation. Prolonged exposure to high noise levels can lead to hearing loss. Ear protection, such as earmuffs or earplugs, is indispensable. Ensure that the chosen protection is rated to attenuate the specific decibel levels associated with woodworking activities.
Dust Masks: Woodworking activities produce fine particles and wood dust, which can pose respiratory risks. Dust masks, particularly those with a high filtration efficiency, act as a crucial defense against inhaling harmful particles. Respirators equipped with filters designed for woodworking applications offer optimal protection.
Proper Hand Tool Usage:
Beyond safety gear, adopting safe hand tool practices significantly mitigates risks. Proper grip and posture are fundamental elements of safe tool operation.
Grip: Maintaining a secure and controlled grip on hand tools is imperative. Gripping too tightly can lead to fatigue and loss of control, while a loose grip may result in slips or mishandling. Achieving the right balance ensures precision and reduces the likelihood of accidents.
Posture: Correct posture not only enhances efficiency but also minimizes the risk of strain or injury. Stand with feet shoulder-width apart and distribute body weight evenly. Avoid overreaching or leaning excessively, as this can lead to loss of balance and compromised control over the tool.
Tool Maintenance
Cleaning:
Proper maintenance begins with routine cleaning. After each use, remove accumulated dust, grime, and debris from the tool’s surface. Utilize a brush, compressed air, or a damp cloth, depending on the type of tool and the nature of the residue. This practice not only preserves the tool’s appearance but also prevents the buildup of corrosive agents.
Sharpening:
Sharp tools are not only more effective but also safer to use. Regular sharpening maintains the tool’s cutting edge and prevents it from becoming dull and inefficient. Techniques for sharpening vary depending on the tool. For instance, chisels may require honing on a sharpening stone, while saws might benefit from specialized files or sharpening jigs. Always follow manufacturer guidelines and use appropriate sharpening tools.
Storage:
Proper storage ensures that hand tools remain in optimal condition over time. Store them in a clean, dry environment, preferably in a tool chest, rack, or cabinet. Avoid leaving tools exposed to moisture or extreme temperature variations, as this can lead to corrosion and damage. Organize tools systematically to facilitate easy access and prevent unnecessary wear and tear.
Significance of Regular Maintenance:
Emphasize that regular maintenance is not merely a matter of aesthetics but directly impacts the performance and longevity of hand tools. Well-maintained tools operate more efficiently, yield better results, and have a significantly extended lifespan compared to neglected counterparts. Encourage readers to incorporate maintenance into their woodworking routines as a fundamental practice for sustained craftsmanship.
Conclusion
In the realm of woodworking, the mastery of hand tools stands as an art form, promising unparalleled precision, craftsmanship, and a profound connection with the material. Through a detailed exploration of chisels, hand saws, planes, and specialized instruments, this guide has unveiled the transformative potential of these tools in the hands of a skilled craftsman. With safety and maintenance practices as cornerstones, woodworkers ensure not only the quality of their work but also the longevity of their cherished tools. Armed with this knowledge, aspiring artisans can curate their own toolkit, personalized to their unique projects and preferences. The mastery of woodworking hand tools is not a destination, but a journey of growth, refinement, and the realization of ever-more ambitious creations. May this guide serve as a compass on that path, guiding craftsmen towards precision, craftsmanship, and a lasting legacy in the world of woodworking. Happy crafting.