Trim Hammer: What is it?
When it comes to finish carpentry, precision is everything. Whether you’re installing delicate moldings, baseboards, or other decorative trim elements, the tools you choose can make a world of difference. In the world of precision tools, one stands out as indispensable for these tasks – the trim hammer. This unassuming yet highly specialized tool is designed to meet the exacting demands of finish carpentry. In this blog post, we’ll delve deep into the world of trim hammers, exploring what they are, why they matter, and how they can elevate your woodworking projects to a new level of excellence.
Importance of Trim Hammer in Finish Carpentry
Finish carpentry is the art of adding those final, refined touches to a construction project. It’s about the subtle nuances that make a space truly exceptional, the meticulous craftsmanship that transforms a house into a home. The core tenet of finish carpentry is precision, and nothing exemplifies this principle better than the use of a trim hammer.
Trim work often involves working with delicate materials such as fine woods and decorative moldings. The slightest miscalculation or errant strike can mar the finish, requiring time-consuming repairs or, in some cases, complete replacement. This is why precision is paramount in finish carpentry – it’s about achieving a seamless, flawless appearance in every detail.
Overview of the Blog Post
In this comprehensive guide, we’ll take you on a journey through the world of trim hammers, also known as finish hammers or trim carpenter’s hammers. We’ll start by defining what a trim hammer is and why it’s different from standard hammers. Then, we’ll explore the various components that make up this precision tool, such as the head, face, claw (if applicable), and handle. You’ll understand why these features are meticulously designed for the specific demands of trim work.
We’ll delve into the importance of weight and balance, how the face of a trim hammer is polished to perfection, and the choices available in terms of handle materials. We’ll showcase the common uses of trim hammers, emphasizing their vital role in projects like baseboard and crown molding installation. You’ll learn why precision and control are the hallmarks of a trim hammer and how to choose the right one for your projects.
Lastly, we’ll discuss the importance of maintaining your trim hammer to ensure it continues to serve you well. By the end of this blog post, you’ll have a comprehensive understanding of why a trim hammer is an essential tool for any finish carpenter, as well as the knowledge to select and use it effectively.
Best Trim Hammers
- Estwing E3-16S 16 oz Straight Claw Hammer
- Weight: 16 ounces
- Handle Material: Leather-wrapped steel
- Features: Polished face, straight claw for nail removal, shock reduction grip.
- Stanley 51-167 22-Ounce FatMax Xtreme AntiVibe Rip Claw Nailing Hammer
- Weight: 22 ounces
- Handle Material: Fiberglass
- Features: AntiVibe technology for reduced vibration, rip claw for nail pulling.
- Vaughan 192-01 TC2012 20-Ounce California Framer Hammer
- Weight: 20 ounces
- Handle Material: Wood
- Features: Milled face for better grip on nails, magnetic nail set.
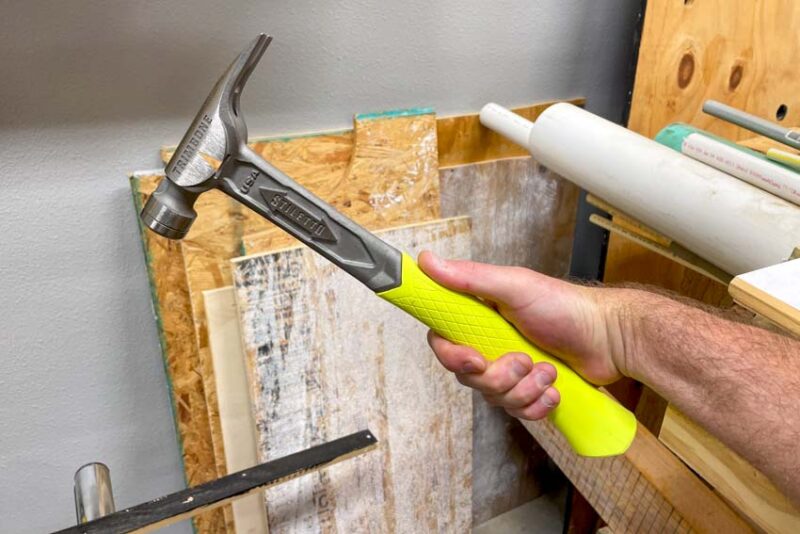
- Stiletto Tools, Inc. TB15MC TiBone 15-Ounce Titanium Milled-Face Hammer
- Weight: 15 ounces
- Handle Material: Titanium
- Features: Lightweight, ergonomic grip, magnetic nail start.
- DEWALT DWHT51054 20 Oz. Rip Claw Hammer
- Weight: 20 ounces
- Handle Material: Fiberglass
- Features: Precision balanced, rip claw for nail removal, large striking face.
- TEKTON 30323 Jacketed Fiberglass Magnetic Head Rip Hammer
- Weight: 16 ounces
- Handle Material: Fiberglass
- Features: Magnetic head for convenient nail start, durable jacketed fiberglass handle.
- Craftsman 18 oz. Flex Claw Hammer
- Weight: 18 ounces
- Handle Material: Steel
- Features: Four claw positions for versatility, magnetic nail starter, ergonomically designed handle.
- Dead On Tools EX9CL Titanium Smooth Face Hammer
- Weight: 18 ounces
- Handle Material: Titanium
- Features: Lightweight, vibration-absorbing grip, nail puller.
- IRWIN Tools 1954889 Fiberglass General Purpose Claw Hammer
- Weight: 16 ounces
- Handle Material: Fiberglass
- Features: ProTouch grip for comfort, smooth face, and curved claw for versatility.
- CRAFTSMAN Hand Sledge Hammer
- Weight: 16 pounds (not ounces)
- Handle Material: Steel
- Features: Suitable for heavy-duty applications, large striking face, long handle for power.
Note that the choice of the best trim hammer depends on your specific needs and preferences. Some are designed for delicate finish work, while others are suitable for heavy-duty applications. Consider the weight, handle material, and any additional features that align with your projects and work style when making your selection.

Comparison Chart of Trim Hammers
| No. | Trim Hammer | Weight (oz) | Handle Material | Features and Specifications |
|---|---|---|---|---|
| 1 | Estwing E3-16S Straight Claw Hammer | 16 | Leather-wrapped steel | Polished face, straight claw, shock reduction grip |
| 2 | Stanley 51-167 FatMax Xtreme Nailing Hammer | 22 | Fiberglass | AntiVibe technology, rip claw, vibration reduction |
| 3 | Vaughan 192-01 California Framer Hammer | 20 | Wood | Milled face, magnetic nail set |
| 4 | Stiletto TB15MC Titanium Milled-Face Hammer | 15 | Titanium | Lightweight, ergonomic grip, magnetic nail start |
| 5 | DEWALT DWHT51054 Rip Claw Hammer | 20 | Fiberglass | Precision balanced, rip claw, large striking face |
| 6 | TEKTON 30323 Magnetic Head Rip Hammer | 16 | Fiberglass | Magnetic head, durable jacketed fiberglass handle |
| 7 | Craftsman 18 oz. Flex Claw Hammer | 18 | Steel | Four claw positions, magnetic nail starter, ergonomic |
| 8 | Dead On Tools EX9CL Titanium Smooth Face Hammer | 18 | Titanium | Lightweight, vibration-absorbing grip, nail puller |
| 9 | IRWIN Tools 1954889 Fiberglass Claw Hammer | 16 | Fiberglass | ProTouch grip, smooth face, curved claw |
| 10 | CRAFTSMAN Hand Sledge Hammer | 16 pounds | Steel | Heavy-duty, large striking face, long handle |
What Is a Trim Hammer?
What a trim hammer is and its primary purpose:
A trim hammer, often referred to as a finish hammer or a trim carpenter’s hammer, is a specialized hand tool meticulously designed for precision carpentry work, primarily used in finish carpentry tasks. Its primary purpose is to facilitate the installation of delicate and ornamental trim elements, such as baseboards, crown molding, chair rails, and other decorative woodwork. Trim hammers are engineered to meet the specific demands of finish carpentry, where accuracy and aesthetics are of paramount importance.
Unlike standard hammers used for framing or general construction, trim hammers are tailored for tasks that require a delicate touch and an exacting level of control. These hammers are distinguished by their unique features and characteristics that cater to the nuances of finish carpentry, making them an indispensable tool for professionals and DIY enthusiasts alike.

Difference from standard hammers:
1. Weight and Balance
One of the primary distinctions between a trim hammer and a standard hammer is its weight and balance. Trim hammers are typically lighter, usually weighing between 12 to 16 ounces (340 to 450 grams). In contrast, standard hammers used in framing or heavier construction can weigh significantly more. The lighter weight of a trim hammer allows carpenters to have better control and precision during tasks that involve driving small fasteners. It reduces the risk of overdriving the nails or damaging the trim material.
2. Face and Finish
The face of a trim hammer is smooth and often polished to perfection. This polished face minimizes the likelihood of leaving marks, dents, or indentations on the surface of the trim materials. This level of finish is crucial when working with trim elements that are meant to enhance the aesthetics of a room. Standard hammers, on the other hand, typically have waffle-pattern or milled faces designed for gripping larger nails or fasteners securely, which may be unnecessary for finish carpentry.
3. Claw
While some trim hammers feature a small, curved claw similar to that of a standard hammer, the claw on a trim hammer is designed to be less aggressive and less likely to cause damage to the surrounding material. It is primarily used for pulling nails or making minor adjustments to small trim pieces.
Various names it goes by:
Trim hammers are known by several names, including:
- Finish Hammer: This name reflects the tool’s primary function, which is to finish or complete a project with precision and attention to detail.
- Trim Carpenter’s Hammer: This name emphasizes the tool’s association with finish carpentry and its importance in the hands of a skilled trim carpenter.
- Finish Nailer: Some individuals also refer to trim hammers as finish nailers, highlighting their common use for driving finish nails with finesse.
Anatomy of a Trim Hammer
A trim hammer is a precision tool designed for finish carpentry, and understanding its anatomy is crucial for making informed decisions when choosing one for your woodworking projects. The trim hammer’s components play a significant role in its performance and the quality of your work.
- Head:
- The head of a trim hammer is a fundamental component. It’s typically narrow and lightweight, weighing between 12 to 16 ounces, which sets it apart from heavier framing hammers.
- The narrow design allows for precise nail placement and control, making it ideal for driving small finish nails without damaging delicate trim materials.
- The head is usually made from high-quality steel, ensuring durability and longevity.
- Face:
- The face of a trim hammer is smooth and polished. This is a key feature that distinguishes it from other hammers. The polished face is essential for preventing surface blemishes when driving nails into trim materials.
- The smooth face reduces the risk of marring or denting wood surfaces, ensuring a clean and professional finish.
- Claw (if applicable):
- Some trim hammers come with a small, curved claw at the back. While this claw is not as pronounced as the claws on larger framing hammers, it serves a purpose.
- The claw can be used for pulling out nails or for adjusting small trim pieces, providing added versatility to the tool. However, it’s not the primary function of a trim hammer.
- Handle:
- The handle of a trim hammer is another critical component. It provides the grip and control necessary for accurate and controlled strikes.
- Handles are typically made of wood, fiberglass, or composite materials, each with its own advantages. Wood handles offer a traditional and aesthetically pleasing look, while fiberglass and composite handles are more durable and resistant to moisture and temperature changes.
- Many trim hammers have textured or ergonomic grips to enhance comfort and reduce hand fatigue during extended use.
Weight and Balance
The weight and balance of a trim hammer are essential factors that greatly influence its performance and suitability for finish carpentry work.
Weight Range:
- The optimal weight range for trim hammers typically falls between 12 to 16 ounces (340 to 450 grams). This weight range strikes a balance between being heavy enough to drive nails effectively and light enough to maintain precision and control.
- Heavier hammers can be challenging to control when working with small finish nails, while lighter hammers may not provide sufficient driving force for larger nails.
Importance of Well-Balanced Hammer:
- A well-balanced hammer is crucial for precise control during finish carpentry tasks. It allows carpenters to accurately place each strike and minimize the risk of damaging the trim materials.
- The balance ensures that the hammerhead is in line with the handle, reducing the likelihood of off-center hits that can lead to surface imperfections.
Advantages of a Lighter Head:
- A lighter head on a trim hammer is advantageous for several reasons:
- Precision: The lighter head allows for fine-tuned, accurate strikes, which is essential when working with delicate materials like molding or trim.
- Reduced Fatigue: A lighter hammer is less tiring to use for extended periods, making it more suitable for intricate and detailed tasks.
- Less Material Damage: The lighter impact reduces the risk of overdriving or splitting the wood, preserving the integrity of the trim.
Understanding the anatomy of a trim hammer and the significance of its weight and balance is crucial for choosing the right tool for finish carpentry projects. The components, such as the head, face, claw (if applicable), and handle, all contribute to the hammer’s performance. The optimal weight and balance ensure precise control and reduce the likelihood of errors and damage, making trim hammers an essential tool for any finish carpenter.
Face and Finish
Significance of a Polished Face on a Trim Hammer
The face of a trim hammer plays a crucial role in ensuring a clean and professional finish in carpentry work. A polished face is a key feature that sets trim hammers apart from their standard counterparts. The significance of a polished face can be understood in the following ways:
- Precision: The smooth, polished surface of the hammer face allows carpenters to precisely position the nail on the trim material. This is essential when working on delicate moldings, baseboards, and other finish carpentry elements. The polished face minimizes the risk of the hammer slipping or bouncing off the nail head during the strike, which could otherwise damage the trim or leave visible marks.
- Aesthetic Appeal: Trim work is all about attention to detail and aesthetics. The polished face helps prevent unsightly dents, dings, or blemishes on the trim material, maintaining its clean and smooth appearance. When nails are driven in using a trim hammer with a polished face, they sit flush with the surface, ensuring a seamless and professional look.
Discuss How the Polished Face Prevents Marring or Denting of Trim Materials
The polished face of a trim hammer acts as a protective barrier between the hammer and the delicate trim materials. It prevents marring and denting in the following ways:
- Even Distribution of Force: When the smooth, polished face of the hammer makes contact with the nail head, the force is evenly distributed across a larger surface area. This minimizes the risk of localized pressure that can cause dents or deformations in the trim material.
- Reduced Friction: The polished surface reduces friction between the hammer face and the trim material. This means that as the nail is driven in, there is less resistance, and the chances of surface damage are significantly reduced.
- Clean, Professional Results: With a polished face, carpenters can achieve a professional finish without the need for excessive sanding, puttying, or other touch-ups. The trim materials retain their pristine appearance, and the installation looks seamless.
Mention Alternatives, Such as Waffle-Pattern or Milled Faces for Different Tasks
While a polished face is the go-to choice for most finish carpentry tasks, there are alternatives available for different applications:
- Waffle-Pattern Face: Some trim hammers feature a waffle-pattern face, which consists of a grid-like pattern of small raised dimples on the face. This design provides additional grip and traction when driving nails. Waffle-pattern faces are often preferred for tasks where a stronger grip is necessary, such as when working with hardwoods or in situations where slip resistance is important.
- Milled Face: A milled face features a series of small, parallel lines or grooves that help grip the nail head securely. Milled faces offer improved control when driving nails and are often used in framing or general construction tasks where appearance is less critical, and a secure connection is the primary concern.
Handle Options
Discuss the Types of Handles Available:
- Wood: Wood handles are the classic choice for trim hammers, and they offer several advantages:
- Aesthetic Appeal: Wood handles provide a traditional and timeless appearance that many carpenters find appealing. They lend a sense of craftsmanship and heritage to the tool.
- Comfortable Grip: Wood handles can be ergonomic and comfortable to hold. They often feature a contoured shape that fits nicely in the hand, reducing hand fatigue during extended use.
- Vibration Dampening: Wood has a natural ability to absorb vibrations, making it a comfortable choice for prolonged use.
- Fiberglass or Composite: Fiberglass and composite handles are known for their durability and resilience, making them suitable for various working conditions:
- Durability: Fiberglass and composite handles are highly resistant to impacts and bending, making them robust and long-lasting.
- Moisture Resistance: Unlike wood, these materials are not susceptible to moisture, rot, or warping. They are an excellent choice when working in humid or wet environments.
- Lightweight: Fiberglass and composite handles are lightweight, reducing the overall weight of the hammer and making it easier to handle.
Textured or Ergonomic Grips for Comfort
Handles, whether made of wood, fiberglass, or composite materials, often come with textured or ergonomic grips to enhance comfort and control for the user:
- Textured Grips: These handles feature textured patterns or coatings that provide a secure and slip-resistant grip. They are especially valuable when working in conditions where the handle might get wet or when a firm grip is necessary.
- Ergonomic Grips: Many modern trim hammers are designed with ergonomic handles that are contoured to fit the natural shape of the hand. This design minimizes strain and reduces hand fatigue during prolonged use, enhancing overall comfort.
Ultimately, the choice of handle type and grip style comes down to personal preference and the specific requirements of the carpentry task at hand. Some carpenters prefer the traditional look and feel of wood handles, while others opt for the durability and moisture resistance of fiberglass or composite handles with modern ergonomic features.
Common Uses of Trim Hammers
Trim hammers are versatile tools that excel in various finish carpentry tasks. They are specifically designed to handle these tasks with precision and finesse:
Typical tasks where trim hammers excel:
- Installing Baseboards: Trim hammers are ideal for attaching baseboards along the bottom of walls. Baseboards, which cover the joint between the wall and the floor, often come in intricate profiles and designs. Trim hammers allow carpenters to secure baseboards firmly in place without damaging the visible surface. The narrow head of the trim hammer ensures that the nails are precisely driven into the baseboards, creating a seamless and aesthetically pleasing finish.
- Crown Molding: Crown molding installation requires exceptional precision because it involves attaching decorative moldings at the junction of walls and ceilings. These moldings often have intricate and ornate designs. Trim hammers are perfect for this task as they allow carpenters to drive nails into the crown molding while maintaining a delicate touch. The polished face of the trim hammer ensures that no surface blemishes or dents mar the molding’s appearance.
- Chair Rail: Chair rail is another decorative element used in interior trim work. It is installed horizontally on walls to protect them from the backs of chairs, but it also serves as a design element. Trim hammers are the go-to choice for attaching chair rail because of their ability to provide accurate nail placement. This ensures that the chair rail is securely fixed in place without any visible marks or damage.
- Other Decorative Trim Elements: Beyond baseboards, crown molding, and chair rail, trim hammers are used for a wide range of other decorative trim elements. This includes wainscoting, picture rail, window and door casings, and more. Whether it’s framing a window with elegant casings or adding a decorative touch to a room with wainscoting, trim hammers are indispensable for maintaining the pristine appearance of these features.
Used for driving small, delicate fasteners like brads and finishing nails:
Trim hammers are not just for attaching trim elements; they are also designed to work with small, delicate fasteners like brads and finishing nails. Here’s how they excel in this aspect:
- Precision and Accuracy: The key advantage of trim hammers is their precision. When working with small fasteners, accuracy is paramount. Trim hammers allow carpenters to precisely place and drive these nails into the material without causing any damage. This precision is especially crucial when attaching delicate trim elements or working on intricate woodworking projects.
- Controlled Force: Trim hammers are well-balanced, with a lightweight head, which means that carpenters can control the force of each strike with great accuracy. This control is essential when working with small fasteners, as it prevents overdriving, which can damage the material or leave unsightly marks. The controlled force ensures that the fasteners are securely in place without any mishaps.
- Delicate Materials: Many trim materials, such as thin veneers, decorative moldings, or fragile wood species, can be easily damaged by a heavy-handed approach. Trim hammers are designed to prevent this by allowing the carpenter to work with the utmost delicacy. The smooth, polished face of the hammer ensures that no dents or dings mar the surface, making it an ideal tool for preserving the beauty of delicate materials.
Trim hammers are essential tools in finish carpentry, excelling in tasks such as installing baseboards, crown molding, chair rail, and other decorative trim elements. Their ability to work with small, delicate fasteners is a testament to their precision and control, making them indispensable for achieving a flawless finish in fine woodworking projects.

Choosing the Right Trim Hammer – Buying Guide
When it comes to selecting the right trim hammer for your finish carpentry projects, several crucial factors must be considered. Making the right choice ensures that you can work with precision and ease. Here are the primary considerations to keep in mind:
Considerations when selecting a trim hammer:
- Weight and Balance: The weight and balance of a trim hammer play a significant role in your ability to control it effectively. As mentioned earlier, trim hammers typically weigh between 12 to 16 ounces (340 to 450 grams). This lightweight design is ideal for fine work. However, the exact weight you choose should align with your personal preferences and the tasks you’ll be performing. If you require more power and are comfortable with a slightly heavier tool, a 16-ounce trim hammer might be suitable. In contrast, those who prefer nimble, precise control may opt for a 12-ounce version. The balance of the hammer should feel comfortable in your hand, allowing you to maintain steady control throughout the project.
- Handle Material: The handle material is another important consideration. Trim hammers come with handles made of wood, fiberglass, or composite materials. Traditionalists often favor wood handles for their classic aesthetic and comfortable grip. However, they may require more maintenance, as wood can be susceptible to moisture and temperature changes. On the other hand, fiberglass or composite handles are known for their durability and resistance to environmental factors. If you anticipate working in varying conditions, these handles may be more suitable, offering both longevity and ease of maintenance. Ultimately, the choice of handle material may come down to personal preference, but practicality should not be overlooked.
- Face Type: The face of a trim hammer can be polished, milled, or have a waffle pattern. As discussed earlier, a polished face is the standard for finish work due to its ability to prevent marring or denting of the trim materials. However, milled and waffle-pattern faces are designed for different tasks. Milled faces provide better grip on the nail head, reducing the chances of the hammer slipping off. A waffle-pattern face adds even more gripping power but may leave more noticeable marks on the surface. Your choice of face type should be determined by the specific requirements of your project. If you need to avoid visible marks, a polished face is the best option. However, if you require extra grip and are willing to perform touch-up work, you might opt for milled or waffle-pattern faces.
Offer tips for making the best choice based on specific project needs:
To make the best choice when selecting a trim hammer based on your specific project needs, consider the following tips:
- Assess the Project: Carefully evaluate the nature of your finish carpentry project. Are you working on delicate trim pieces, intricate moldings, or more robust materials like baseboards? The specific tasks will dictate the weight and balance of the trim hammer you require.
- Handle Comfort: Consider how long you’ll be using the trim hammer during your project. If it’s a large-scale project, a comfortable handle grip is vital to prevent hand fatigue. Handle material should be chosen based on both the environmental conditions and personal comfort.
- Surface Finish: Pay close attention to the desired finish on the trim materials. If you need a pristine, mark-free surface, a polished face is essential. However, if you’re comfortable with a bit of surface touching up, a milled or waffle-pattern face may be more suitable, especially for situations where grip is crucial.
- Budget: Trim hammers come in a range of price points. Consider your budget and invest in a high-quality hammer that balances your project needs and long-term utility.
By taking these considerations and tips into account, you can confidently select the right trim hammer that enhances your precision and control in your finish carpentry projects.
Conclusion
The trim hammer stands as an indispensable tool in the arsenal of finish carpenters and woodworking enthusiasts alike. With its lightweight design, well-balanced construction, and polished face, it enables impeccable precision and control in tasks like installing baseboards, crown molding, chair rail, and other decorative trim elements. The careful selection of a trim hammer, with attention to weight, balance, handle material, and face type, is key to ensuring that your projects are executed flawlessly. Whether you opt for a traditional wooden handle or a more modern, durable material, the right choice hinges on your project’s demands and your personal comfort. While trim hammers may vary in design, their common purpose is to empower you to create a professional finish with ease and finesse. So, next time you embark on a finish carpentry project, remember that your choice of a trim hammer is your ticket to achieving that immaculate, polished look that turns ordinary spaces into extraordinary ones.