Removing Oven Door to Clean the Oven
Welcome, foodies, bakers, and kitchen enthusiasts! Today, we’re diving into the exciting world of oven door removal! Have you ever found yourself with a messy spill inside your oven and wished you could just take the door off to clean it? Or maybe you’re doing some kitchen renovations and need to remove oven door for a new appliance installation. Whatever your reason may be, removing an oven door can seem like a daunting task. But don’t worry, we’re here to guide you through the process and make it a breeze!
In this post, we’ll be exploring the different types of oven doors and their removal processes. So, whether you own a Frigidaire, LG, Whirlpool, KitchenAid, Kenmore, Samsung, Bosch, or Electrolux oven, we’ve got you covered. Let’s get started!
Brace yourself for a journey filled with fun, easy-to-follow instructions for ovens of various companies, and a whole lot of door-removing magic!

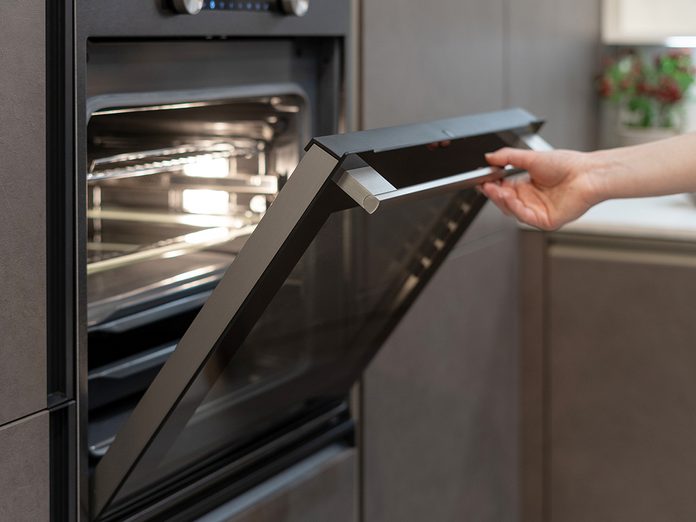
Woman hand opening door of new modern oven with light built-in in black kitchen cabinet
Removing Frigidaire Oven Door
Are you ready to give your Frigidaire oven a much-needed facelift? The first step to revamping your kitchen appliance is removing that oven door! But don’t worry, it’s not as daunting as it may seem. With our step-by-step instructions and helpful tips, you’ll have that door off in no time.
So, let’s get started!
Step-by-Step Instructions
- Start by locating the hinges that hold the door in place.
- You may need to remove any screws or clips that secure the hinges to the oven.
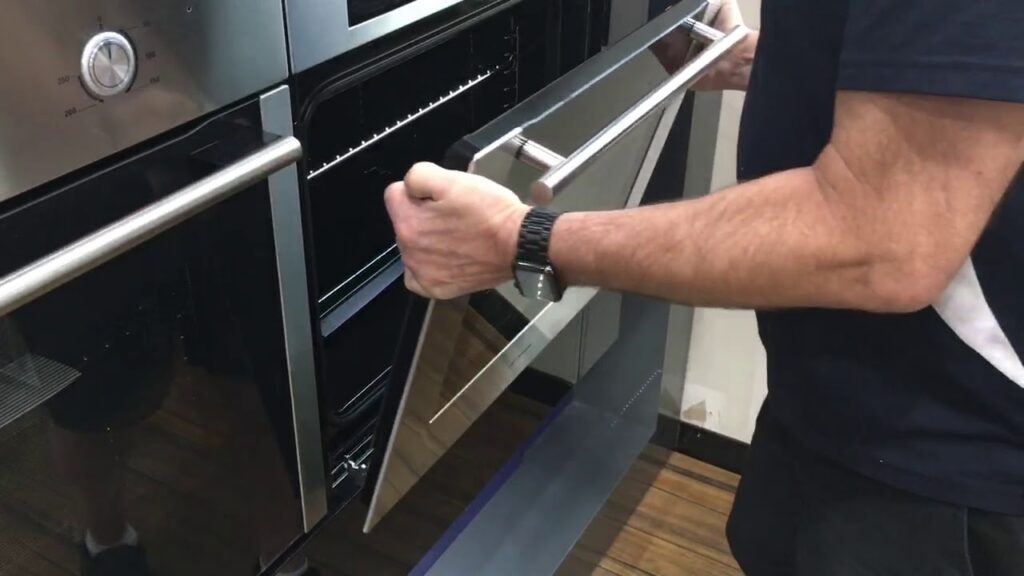
- Gently lift the door up and away from the hinges. Be careful not to let the door drop or you might damage it.
- Once you’ve lifted the door off the hinges, place it on a flat, secure surface.
And just like that, you’ve successfully removed your Frigidaire oven door! Easy peasy, right?

Common Difficulties and Tips for Overcoming Them
- Struggling to locate the hinges: If you’re having trouble finding the hinges, try checking the owner’s manual or the manufacturer’s website for more information.
- Door won’t budge: If the door is stuck and won’t lift off the hinges, try gently wiggling it side to side. You can also try using a lubricant, such as silicone spray, to loosen any buildup that may be preventing the door from moving.
- Damaged door: If the door has been damaged in any way, it’s best to leave the repair to a professional. Attempting to fix it yourself could result in further damage or even injury.
So there you have it, folks! Removing a Frigidaire oven door is as easy as 1, 2, 3. With these tips and instructions, you’ll have that door off in no time and your kitchen will be looking brand spanking new!
Removing LG Oven Door: A Fun Adventure Awaits!
Are you ready to take on the challenge of removing your LG oven door? Well, buckle up, because you’re in for an exciting ride! Follow our step-by-step instructions to make the process a breeze.
Step-by-Step Instructions
- First, gather all the tools you’ll need, including a screwdriver and some gloves to protect your hands.
- Locate the screws that hold the door in place and remove them one by one.
- Once the screws are out, you can gently lift the door off its hinges.
Voila! You’ve successfully removed your LG oven door.
Common Difficulties and Tips for Overcoming Them
Struggling to find the screws? They may be located in unexpected places, such as behind a panel or at the bottom of the door.
The door feeling heavy? Don’t worry, that’s normal. Just grip it firmly and lift with care.
Having trouble getting the door off its hinges? Double-check that all screws have been removed and that the door is not still connected in any other way.
So, there you have it! With our help, removing your LG oven door is easy peasy lemon squeezy. Now, go forth and conquer!
Removing Whirlpool Oven Door: Let’s Get the Party Started!
Are you ready to tackle the task of removing your Whirlpool oven door like a boss? Well, buckle up because we’ve got the step-by-step instructions to make the process a piece of cake!
Step-by-step instructions: Ready, Set, Remove!
- First, make sure your oven is completely cool and unplugged. Safety first!
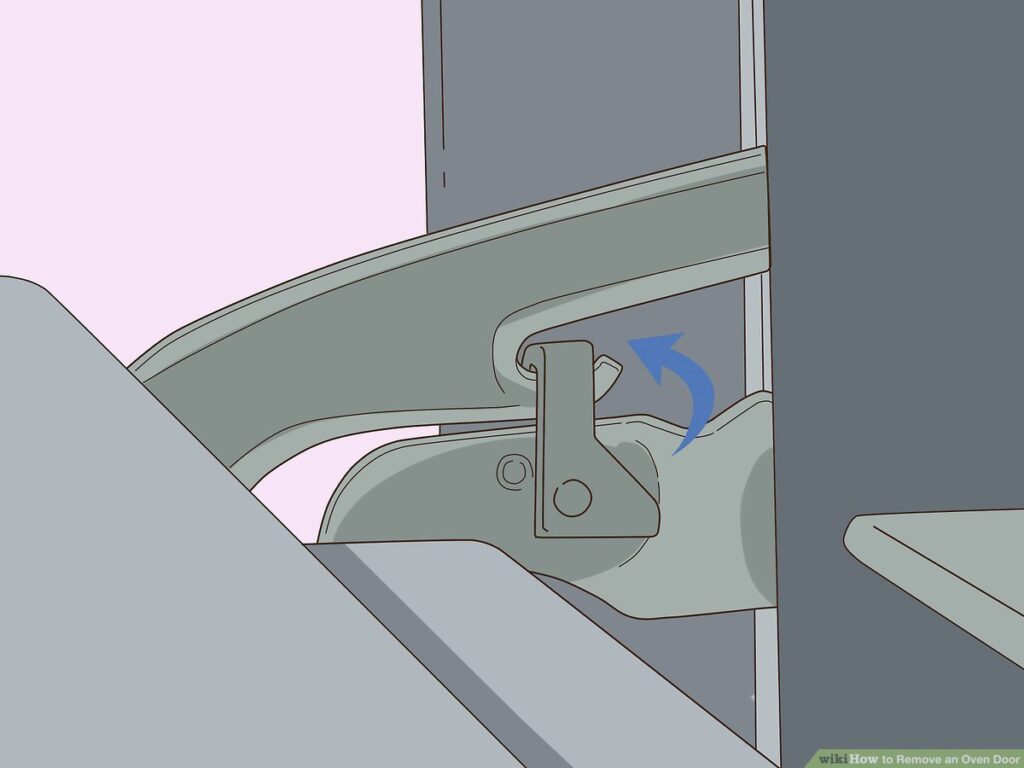
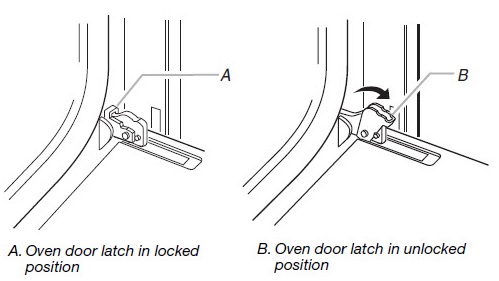
- Locate the hinges on the top and bottom of the door and release the latch on each hinge.
- Slowly lift the door away from the oven, taking care not to damage any connecting parts.
Voila! You’ve successfully removed the door. Congrats!
Common difficulties and tips for overcoming them: No Sweat!
If you’re feeling a little intimidated by the process, don’t worry! Here are some common difficulties and tips to help you overcome them:
- Struggling to find the hinges? Look along the edges of the door and you should spot them in no time.
- Can’t seem to release the latch? Try using a flathead screwdriver to gently pry it open.
- The door feels heavy? No problem! Just be sure to lift it evenly from both hinges to avoid any damage.
And there you have it! Removing your Whirlpool oven door has never been easier. So, go ahead and get ready to bask in the glory of a job well done!

Removing KitchenAid Oven Door
“Ready to take your baking game to the next level with a sparkling clean KitchenAid oven door? Well, you’ve come to the right place! With these step-by-step instructions and helpful tips, you’ll have that door off in no time and your kitchen smelling sweet as pie!
Step-by-Step Instructions
- Step 1: Gather your tools. You’ll need a screwdriver, a pair of pliers, and perhaps a putty knife to loosen any stuck-on gunk.
- Step 2: Find the hinges. Look for two metal hinges at the bottom of the door and locate the screws that hold them in place.
- Step 3: Remove the screws. Using your screwdriver, carefully remove the screws that hold the hinges in place. You may need to use your pliers to grip and turn the screws if they are stuck.
- Step 4: Lift the door off. Once the screws are removed, gently lift the door off the hinges. If the door is stuck, use your putty knife to carefully loosen any gunk around the hinges.
Common difficulties and tips:
- If the door is heavy, be sure to lift it with a partner to avoid injury.
- If the hinges are stuck, try applying a small amount of lubricant to help loosen them.
- If the door won’t come off, double check to make sure all screws have been removed.
And that’s it! With these simple steps, your KitchenAid oven door will be off and ready for a deep clean in no time! So, let’s get started and show that oven who’s boss!”
Removing Kenmore Oven Door: Say Goodbye to Stuck Doors!
Step-by-Step Instructions: Let’s Make it Easy!
Removing a Kenmore oven door doesn’t have to be rocket science! With these simple steps, you’ll be able to remove that stubborn door in no time!
- Turn off the oven and let it cool completely
- Locate the hinges on the door and the oven
- Release the hinges by pressing the release button or lifting the lever (depending on your model)
- Carefully lift the door off the hinges and set it aside
Common Difficulties and Tips for Overcoming Them: Get Over the Hurdles!
We know that sometimes things don’t go according to plan. But don’t worry, we’ve got you covered! Here are some common difficulties and tips to help you overcome them.
- Stuck hinges: If the hinges are stuck, you can try spraying a little bit of WD-40 on them to loosen them up.
- Heavy door: If the door is heavy, make sure to have someone help you lift it off the hinges.
- Tight space: If you have limited space around the oven, you may need to remove the door in two parts. Just follow the manufacturer’s instructions for removing the door in two parts, and you’ll be good to go!

Removing Samsung Oven Door: A Door-less Oven is Within Reach
Step-by-Step Instructions
Door-less Cooking is a Breeze! Removing your Samsung oven door has never been easier! Just follow these simple steps, and you’ll be cooking up a storm in no time!
- Turn off the oven and let it cool completely
- Locate the hinges on the door and the oven
- Release the hinges by pressing the release button or lifting the lever (depending on your model)
- Carefully lift the door off the hinges and set it aside
Common Difficulties and Tips for Overcoming Them
Don’t Let a Little Hurdle Stand in Your Way! We know that sometimes things don’t go according to plan. But don’t worry, we’ve got you covered! Here are some common difficulties and tips to help you overcome them.
- Stuck hinges: If the hinges are stuck, you can try spraying a little bit of WD-40 on them to loosen them up.
- Heavy door: If the door is heavy, make sure to have someone help you lift it off the hinges.
- Tight space: If you have limited space around the oven, you may need to remove the door in two parts. Just follow the manufacturer’s instructions for removing the door in two parts, and you’ll be good to go!
So what are you waiting for? Get started on removing your Samsung oven door today, and take the first step towards a door-less cooking experience!
Removing Bosch Oven Door!
Step-by-Step Instructions
Let’s Get Started with Step-by-Step Instructions.
- Put on your safety gloves and goggles.
- Locate the hinges and release mechanism on your Bosch oven door.
- Using a screwdriver, gently remove the screws that hold the hinges in place.
- Carefully lift the door from the hinges and place it in a safe and secure location.
Common Difficulties and How to Overcome Them
- Stuck hinges: If the hinges are stuck, try gently tapping them with a rubber mallet to loosen them up.
- Tight screws: If the screws are too tight, try using a pair of pliers to loosen them.
- Heavy door: If the door is too heavy to lift, ask a friend or family member to help you.
Removing Electrolux Oven Door: Oven Door We Hardly Knew Ye!
Step-by-Step Instructions to a Door-Free Oven
- Gather your tools and safety gear.
- Locate the hinges and release mechanism on your Electrolux oven door.
- Use a screwdriver to remove the screws holding the hinges in place.
- Carefully lift the door from the hinges and set it aside in a safe location.
Facing Some Obstacles? Here’s How to Overcome Them
- Tight hinges: If the hinges are too tight, try spraying them with some lubricant to loosen them up.
- Stuck screws: If the screws are stuck, try using a drill or power screwdriver to remove them.
- Heavy door: If the door is too heavy to lift, ask a friend or family member to lend a hand.
The Grand Finale of Removing Oven Door!
Removing an oven door can seem like a daunting task, but with the right instructions and a little elbow grease, it’s totally doable! Whether you’re dealing with a Frigidaire, LG, Whirlpool, KitchenAid, Kenmore, Samsung, Bosch, or Electrolux oven, the process is essentially the same: follow the manufacturer’s instructions, be mindful of any potential difficulties, and take it step-by-step. Before you know it, you’ll be looking at your shiny, door-less oven and feeling proud of your DIY prowess.
Follow the Rules while Removing Oven Door
Of course, one thing you definitely don’t want to do is make a mistake that could cause harm to your oven or yourself. That’s why following the manufacturer’s instructions is so important – they know their product best! If you’re ever in doubt, or if the instructions just don’t seem to be making sense, don’t hesitate to reach out to a professional. They can help guide you through the process and ensure that everything goes smoothly. Trust us, it’s worth the investment!
Removing an oven door may seem like a challenge, but with the right instructions and a little bit of effort, you can do it! And when in doubt, don’t hesitate to reach out to a professional to ensure that everything goes smoothly. Happy DIY-ing!
Thanks for posting. I really enjoyed reading it, especially because it addressed my problem. It helped me a lot and I hope it will help others too.
Thank you for your help and this post. It’s been great.
You’ve the most impressive websites.
Thank you for your articles. They are very helpful to me. Can you help me with something?
Thank you for writing this post. I like the subject too.
Greetings! I’ve been reading your blog for some time now and finally got the bravery to go ahead and give you a shout out from Huffman Texas! Just wanted to mention keep up the great work!
Write more, thats all I have to say. Literally, it seems as though you relied on the video to make your point. You clearly know what youre talking about, why waste your intelligence on just posting videos to your weblog when you could be giving us something informative to read?
We provide residential building construction services, bungalow construction services, hospital construction services, home building construction services, and independent house construction services
Heya i抦 for the first time here. I found this board and I find It truly useful & it helped me out a lot. I hope to give something back and help others like you helped me.