1. Nailing Techniques for DIY Projects
Nailing is a fundamental skill that every DIY enthusiast and woodworker should have in their toolkit. Whether you’re building furniture, repairing a fence, or working on any kind of home improvement project, knowing the right nailing techniques can make a significant difference in the outcome of your work. In this comprehensive guide, we’ll explore various nailing techniques, their details, and tips to help you achieve professional results in your DIY endeavors.
Selecting the Right Nail is essential for Nailing Techniques
Understanding Nail Types and Sizes
Choosing the right nail for your DIY project is crucial for achieving a successful outcome. Nails come in various types, sizes, and materials, each designed for specific purposes. Here’s a breakdown of some common nail types:
- Common Nails: These are your standard, everyday nails. They have a straight shank and a flat head, making them suitable for general-purpose use, such as framing and carpentry.
- Finishing Nails: These nails have smaller, slender heads that can be easily concealed. They are ideal for applications where aesthetics are important, like attaching trim or molding.
- Brad Nails: Brad nails are very thin and are often used in delicate woodworking and finishing work. They leave minimal marks, making them great for projects where appearance matters.
- Pin Nails: Even thinner than brad nails, pin nails are typically used for attaching extremely thin or fragile materials like veneer, without causing damage.
- Box Nails: Box nails have a thinner shank compared to common nails, making them well-suited for tasks like box construction and light framing.
When choosing the right nail size, it’s essential to consider the thickness of the material you’re working with. The rule of thumb is that the nail should be at least three times longer than the material you’re fastening. For instance, when nailing 3/4-inch thick wood, a nail of at least 2 1/4 inches in length is appropriate. Using nails that are too long may cause splitting, while nails that are too short won’t provide a secure hold.
Factors to Consider When Choosing Nails
Several factors influence your choice of nails for a particular project:
- Material: Consider the material you’ll be nailing into, whether it’s wood, drywall, metal, or something else. Different materials require specific types of nails for optimal performance.
- Weight and Load: Think about the weight or load the nail will need to support. For heavy-duty applications, like framing, you’ll need thicker, more robust nails.
- Environmental Conditions: If your project is exposed to moisture or outdoor elements, corrosion-resistant nails, such as galvanized or stainless steel, are a better choice to prevent rust.
- Aesthetics: For visible areas or projects where appearance matters, like fine woodworking or furniture making, opt for nails that can be concealed or have decorative features.
- Tools Used: The choice of nails may also depend on the tools you have available. Some nails are designed for use with specific nail guns or hammers.
2. Essential Tools for Nailing
Hammers and Nail Guns
Hammers and nail guns are the primary tools for driving nails into materials. Here’s a brief overview of both:
- Hammers: Hammers are the most traditional and versatile tool for nailing. They come in various sizes and styles, with claw hammers being a popular choice. The claw on a hammer allows you to remove nails when needed. Select a hammer that feels comfortable in your hand and suits the type of work you’ll be doing.
- Nail Guns: Nail guns, or nailers, are power tools that can significantly speed up the nailing process. They are available in various types, including framing nailers, finish nailers, and brad nailers. Each type is designed for specific applications. Nail guns are perfect for larger projects but require proper handling and safety precautions.
Nail Sets and Nail Punches
Nail sets and nail punches are essential for driving nails below the surface of the material without damaging it. These tools are particularly useful when you want to hide the nail heads for a clean, finished appearance. Here’s how they work:
- Nail Sets: Nail sets are small, tapered tools with a flat head on one end. After hammering a nail into the material, you can use a nail set to recess the nail head slightly below the surface. This allows you to fill the depression with wood putty or filler for a seamless finish.
- Nail Punches: Nail punches are similar to nail sets but are often used for larger nails and more heavy-duty applications. They come in various sizes and are designed to withstand the force of hammer blows.
Clamps and Vises
Clamps and vises play a critical role in securing the workpiece, ensuring stability and accuracy during nailing. Here’s how they aid in your nailing tasks:
- Clamps: Clamps are used to hold pieces of wood or other materials together, allowing you to align and secure them before nailing. This is especially helpful when joining pieces at right angles, such as in joinery or cabinetmaking.
- Vises: Vises are workbench-mounted tools that provide a sturdy, stationary platform for nailing or woodworking tasks. They can hold your workpiece in place, freeing both your hands for accurate nailing. Vises are particularly useful for precision work, like carving or detail-oriented projects.
By understanding the various nail types and sizes and having the essential tools at your disposal, you’ll be well-prepared to tackle your DIY projects with confidence and precision. These tools and knowledge are the foundation for successful nailing techniques.
3. Preparation and Safety Measures
Before you begin any nailing project, it’s essential to set up your workspace properly and take necessary safety precautions. These steps ensure that you can work efficiently and protect yourself from potential hazards.
Proper Workspace Setup:
- Clean and Organized Area: Start by clearing your workspace of any clutter or obstacles. This not only helps you move around more freely but also reduces the risk of tripping or accidentally stepping on a nail.
- Well-Lit Environment: Ensure your workspace is well-lit, either with natural daylight or adequate artificial lighting. Good lighting is crucial for precision and safety.
- Stable Work Surface: If possible, work on a stable and level surface, such as a workbench or sawhorse. A wobbly or uneven work surface can lead to inaccurate nailing and potential accidents.
- Secure Your Materials: Make sure the materials you’re nailing are properly secured. Clamps or vises can be used to hold pieces together, keeping them steady during the nailing process.
- Adequate Ventilation: If you’re working with materials that produce dust or fumes (e.g., treated wood or MDF), ensure proper ventilation in your workspace. Use a dust mask if necessary.
Safety Gear and Precautions:
- Eye Protection: Safety goggles or glasses should always be worn to shield your eyes from flying wood chips, debris, or nail fragments.
- Hearing Protection: If you’re using a nail gun or any other power tool, consider wearing hearing protection to safeguard your ears from prolonged exposure to loud noise.
- Respiratory Protection: For projects involving dusty or toxic materials, a respirator or dust mask is essential to protect your respiratory system from harmful particles.
- Gloves: Wearing work gloves can help prevent splinters and injuries to your hands, especially when handling rough or splintery wood.
- Footwear: Sturdy, closed-toe shoes or boots provide added protection against dropped nails and other hazards.
- First Aid Kit: Keep a basic first aid kit on hand in case of minor injuries. It should include items like band-aids, antiseptic wipes, and sterile gauze.
- Know Your Tools: Familiarize yourself with the tools you’ll be using, whether it’s a hammer, nail gun, or nail set. Read the manufacturer’s instructions and safety guidelines.
- Keep Work Area Clean: Regularly clean up your work area to remove nails, debris, and tools when they are not in use. This prevents accidents and keeps your workspace organized.
- Beware of Electrical Cords: If your project involves power tools, be cautious with electrical cords. Make sure they’re out of the way to avoid tripping.
- Stay Focused: Concentration is key when nailing. Avoid distractions and stay focused on your task to minimize the risk of accidents.
By following these preparation and safety measures, you’ll create a safer, more efficient workspace for your nailing projects. Remember that safety should always be a top priority in any DIY endeavor to ensure that you complete your projects with the best possible results and without harm to yourself or others.

4. Common Nailing Techniques
Nailing is a foundational skill for any DIY enthusiast, and understanding various nailing techniques is essential for different projects. In this section, we’ll dive into the details of five common nailing techniques to help you get started on your DIY journey.
Common Nail: Learn the basics of driving a common nail
Common nails, also known as wire nails, are the most traditional and straightforward type of nail used in woodworking and construction. They come in various sizes, making them suitable for a wide range of applications. To master driving common nails effectively, follow these steps:
- Select the Right Nail: Choose a common nail that suits the thickness of the materials you’re joining. The nail should be at least three times longer than the thickness of the top piece of wood.
- Prepare the Workpiece: Align the pieces of wood you want to join and hold them securely in place. Use clamps or a vise if necessary to prevent any movement during nailing.
- Position the Nail: Hold the nail between your fingers or use pliers to keep it steady. Position the nail at a 45-degree angle to the wood’s surface.
- Hammering Technique: With your non-dominant hand, hold the hammer with a firm grip near the end of the handle. Begin by tapping the nail lightly to create a starter hole. Once you have a small indentation, continue to drive the nail by striking it with more force, keeping the hammer perpendicular to the nail.
- Nail Depth: Drive the nail until it is flush with the wood’s surface, being careful not to overdrive it, which can cause splitting. If the nail head is still slightly raised, you can use a nail set to countersink it.
Finishing Nail: Achieve a polished look with finishing nails.
Finishing nails are designed for projects where aesthetics are crucial, such as trim work and furniture assembly. They have a small, thin head that can be easily concealed. To use finishing nails effectively:
- Choose the Right Nail: Select a finishing nail with a head size that matches your project’s requirements. The nail should be long enough to penetrate both pieces of material securely.
- Position the Nail: Just like with common nails, position the finishing nail at a slight angle to the wood’s surface.
- Hammering Technique: Use a lightweight hammer, or even a rubber mallet, to drive the finishing nail gently into the wood. The goal is to create a small hole without damaging the wood surface.
- Countersinking: After the nail is in place, use a nail set to tap it below the wood’s surface. This allows you to fill the hole with wood putty or filler, creating a seamless finish.
Brad Nailing: Explore the versatility of brad nails.
Brad nails are a type of finishing nail, but they are even thinner and shorter, making them ideal for delicate and precision work. Brad nailers, also known as brad guns, are commonly used to drive brad nails efficiently. Here’s how to use them:
- Select the Right Brad Nail: Choose the appropriate length and gauge of brad nail for your project. Brad nails typically range from 18 to 23 gauge, with lower gauge numbers indicating thicker nails.
- Position the Brad Nailer: Hold the brad nailer perpendicular to the work surface, aligning it with your desired nailing location. Make sure the safety tip of the nailer is in contact with the wood.
- Safety Precautions: Keep your fingers away from the nailing point, as brad nailers can fire quickly.
- Pull the Trigger: Gently squeeze the trigger to release the brad nail into the wood. Brad nails are typically very short, so they don’t require countersinking.
Pin Nailing: Master pin nailing for delicate projects.
Pin nails are even finer than brad nails and are commonly used for very delicate work or for attaching narrow trim pieces. A pin nailer is the best tool for driving pin nails, and the process is similar to using a brad nailer:
- Select the Right Pin Nail: Choose the appropriate length and gauge of pin nail for your project. Pin nails are often 23 gauge and very short.
- Position the Pin Nailer: Hold the pin nailer perpendicular to the work surface and align it with the nailing point.
- Safety Precautions: Be cautious when handling pin nails and pin nailers, as the nails are extremely thin and can bend easily.
- Pull the Trigger: Squeeze the trigger to release the pin nail. Due to their size, pin nails rarely leave visible marks and usually do not require any additional finishing steps.
Box Nailing: Understand the principles of box nailing.
Box nailing, also known as blind nailing, is a technique used to join two pieces of wood without showing any visible nail heads. This method is often used in cabinetmaking and other fine woodworking projects. Here’s how to perform box nailing:
- Align the Pieces: Ensure the two pieces of wood are precisely aligned and held securely together. Clamps or vises are helpful for this.
- Select the Right Nails: Box nails are typically longer than common nails and have a smaller head. Choose nails that are long enough to penetrate both pieces of wood without emerging.
- Nail Angle: Position the nail at a 45-degree angle to the wood’s surface. Drive the nail through the top piece and into the second piece, creating a strong joint without visible nail heads.
- Countersink (Optional): Depending on the project, you may choose to countersink the nails and cover the holes with wood putty for a completely seamless look.
By mastering these common nailing techniques, you’ll be well-equipped to handle a wide range of DIY projects, from basic construction to intricate woodworking. Remember that practice is key to becoming proficient, so take your time to perfect your skills and achieve professional-quality results in your endeavors.
5. Tips for Accurate Nailing
Nailing accuracy is crucial for the structural integrity and aesthetics of your DIY projects. To ensure your nails go where you want them to and hold securely, pay close attention to the following tips:
Holding and Positioning the Nail:
Proper nail placement is essential for accurate nailing. Follow these steps to hold and position the nail correctly:
- Grip the nail with your non-dominant hand: Hold the nail between your thumb and forefinger, leaving about half an inch of the nail exposed. This provides you with control over the nail while keeping your fingers at a safe distance.
- Angle the nail: Position the nail at the desired angle and place its tip on the spot where you want to drive it in. Ensure that the angle is perpendicular to the surface you’re nailing into for the most secure grip.
- Use a nail set for fine control: For particularly delicate work or when dealing with small finishing nails, consider using a nail set. A nail set is a small, cylindrical tool with a pointed tip that helps you position the nail accurately and start it without damaging the wood’s surface.
Achieving the Right Depth:
Driving a nail to the correct depth is vital to the stability of your project. Here’s how to ensure the nail penetrates to the appropriate depth:
- Use the right-sized hammer: Select a hammer that matches the nail size you’re using. A heavy hammer for large nails and a lighter one for smaller nails. This will help control the force you apply when striking the nail.
- Control your hammering force: Strike the nail with a controlled and consistent force. Too much force can drive the nail too deep, potentially splitting the wood, while too little force can leave the nail proud (above the surface), affecting the aesthetics and safety of your project.
- Test your depth with practice: Before nailing in a visible area of your project, practice on a scrap piece of the same material to gauge the appropriate hammering force. Adjust your technique until you consistently achieve the desired depth.
Avoiding Splitting and Bending:
Wood splitting and nail bending are common problems during nailing, especially in hardwoods. Follow these tips to avoid these issues:
- Pre-drill pilot holes: Especially when working with hardwoods, pre-drilling small pilot holes can help guide the nail without causing the wood to split. Choose a drill bit that matches the nail’s diameter.
- Choose the right nail type: For dense or hardwoods, consider using spiral or ring-shank nails, which have better holding power and are less likely to split the wood.
- Angle nails for splitting prevention: If you’re nailing near the edge of a piece of wood, try to angle the nail slightly away from the edge to reduce the risk of splitting.
- Relieve pressure with multiple nails: When joining two pieces of wood, use multiple nails instead of a single one. This distributes the pressure and reduces the chance of splitting.
- Use a nail gun with depth control: If you have access to a nail gun, select a model with depth control settings. This allows you to precisely adjust the nail’s depth for consistent results.
By following these tips for accurate nailing, you’ll significantly improve the quality of your DIY projects. Practice is key, so don’t be discouraged if you don’t get it perfect on your first try. Over time, you’ll develop the skills and intuition needed to become a proficient nailer.
6. Nailing in Different Materials
Nailing is a versatile skill that can be applied to various materials, each with its unique challenges and considerations. Whether you’re working with wood, drywall, or metal, understanding the nuances of nailing in different materials is crucial for the success of your DIY projects.
Nailing in Wood:
Wood is one of the most common materials used in DIY projects and carpentry. When nailing in wood, consider the following:
1. Choosing the Right Nails: Use common or finishing nails for wood. The choice depends on the project; common nails are ideal for structural work, while finishing nails are best for applications where the nail head needs to be concealed.
2. Nail Size and Placement: Ensure that the nail size and length are appropriate for the wood’s thickness. The nail should penetrate at least 1.5 times the thickness of the wood for a secure hold. Position the nail perpendicular to the wood’s surface for maximum holding power.
3. Avoid Splitting: Pre-drilling pilot holes can help prevent splitting, especially when nailing near the wood’s edge. Use a nail set to countersink the nail and fill any resulting holes with wood putty for a smooth finish.
Nailing in Drywall:
Drywall is a delicate material commonly used for interior walls and ceilings. When nailing in drywall, follow these guidelines:
1. Use Drywall Screws: While nails can be used for hanging drywall, it’s generally recommended to use drywall screws for better holding power and reduced risk of popping.
2. Spacing and Edge Distances: Space your fasteners every 16 inches along studs, and keep them at least 1/2 inch from the edges to prevent cracking.
3. Sink the Fasteners: Make sure to countersink the screws slightly below the drywall’s surface, so they can be covered with joint compound for a seamless finish.
7. Nailing in Metal:
Nailing in metal requires different techniques and tools due to the hardness of the material. Here’s how to do it effectively:
1. Choose Appropriate Fasteners: For nailing in metal, use specialized fasteners such as self-tapping screws or metal nails designed for the job. These fasteners are specifically designed to penetrate and hold in metal.
2. Pre-Drilling Holes: In most cases, you’ll need to pre-drill pilot holes in the metal to make it easier to drive the fasteners. Ensure the drill bit is appropriate for the fastener size.
3. Use Adequate Force: Metal is harder than wood, so it may require more force to drive the fastener in. Use a hammer or power tool, like a drill/driver, with adjustable torque settings to ensure the fasteners are secure but not over-tightened.
Lubrication
When nailing in certain metals like steel, lubrication can reduce friction and make driving the fasteners smoother.
8. Advanced Nailing Techniques
Nailing isn’t just about driving nails straight into materials; it also involves advanced techniques that can enhance the strength, aesthetics, and overall quality of your projects. In this section, we’ll delve into three advanced nailing techniques that every DIY enthusiast should be aware of.
Toe-Nailing: An angled nailing technique for added strength
Toe-nailing, also known as skew nailing or angle nailing, is a technique that involves driving nails at an angle into a piece of wood. This method is especially useful for increasing the structural integrity of joints and connections, making it ideal for framing, woodworking, and other load-bearing applications.
How to Perform Toe-Nailing:
- Positioning: Begin by aligning the two pieces of wood you want to join. In the case of framing, this might involve attaching a vertical stud to a horizontal header or sill plate.
- Angle Selection: Determine the angle at which you want to drive the nail. A common angle is 45 degrees, but this can vary depending on the application and the desired strength of the joint.
- Nail Placement: Use a framing square or similar tool to mark the angle on the surface of the wood. Then, place the nail on the marked spot and start it with a few light taps using a hammer.
- Driving the Nail: Hold the nail at the chosen angle and strike it with the hammer. The nail should penetrate both pieces of wood, creating a strong and secure connection.
- Finishing: After driving the nail, check to ensure the pieces of wood are properly aligned and flush. If necessary, make adjustments before securing the joint further.
Toe-nailing is particularly useful in situations where you need to provide extra stability or resistance against forces that might pull the joint apart. It’s commonly used in framing to create robust connections between studs, rafters, and headers.
Dovetail Nailing: A unique method for joining wooden components
Dovetail nailing is a specialized technique used in woodworking to create strong, interlocking joints between wooden components. It resembles the classic dovetail joint but involves the use of nails to secure the connection. This method is known for its exceptional strength and durability.
How to Perform Dovetail Nailing:
- Prepare the Wood: Start by cutting dovetail grooves or slots into the wood pieces you wish to join. These grooves should be precise and match each other for a tight fit.
- Selecting Nails: Choose nails that are slightly shorter than the width of the wood. You’ll be driving them through the grooves, so they should not extend beyond the opposite side of the joint.
- Insert Nails: Insert the nails into the grooves, ensuring they are evenly spaced along the joint.
- Driving Nails: Using a hammer, gently tap the nails into the grooves. The nails should go in snugly, securing the joint tightly.
- Finishing: Sand or plane the surface of the wood to create a flush, seamless appearance.
Dovetail nailing is a remarkable method for creating elegant and durable wooden joints. It’s often employed in fine woodworking, cabinetmaking, and other projects where aesthetics and strength are equally important.
Blind Nailing: Conceal nails for a seamless finish
Blind nailing, also known as concealed nailing, is a technique used to hide the nails and create a smooth, clean finish on the surface of the wood. This method is commonly used in projects where a nail-free appearance is desired, such as installing baseboards, trim, or paneling.
How to Perform Blind Nailing:
- Select the Right Nails: Choose finishing nails that are long enough to securely hold the material but not so long that they would penetrate through the surface.
- Positioning: Place the nail near the edge of the material, where it will be concealed once the adjacent piece is attached.
- Drive the Nail: Angle the nail slightly away from the surface of the wood, ensuring it enters the wood but doesn’t protrude through the other side.
- Attach the Adjacent Piece: After securing the first piece, attach the adjacent piece, which will conceal the nail.
- Fill and Finish: To complete the process, fill the nail hole with wood putty or filler, sand the surface smooth, and apply the desired finish.
Blind nailing provides a clean, professional look to woodworking projects. It’s a favorite method for carpenters and woodworkers who want a seamless appearance without visible fasteners.

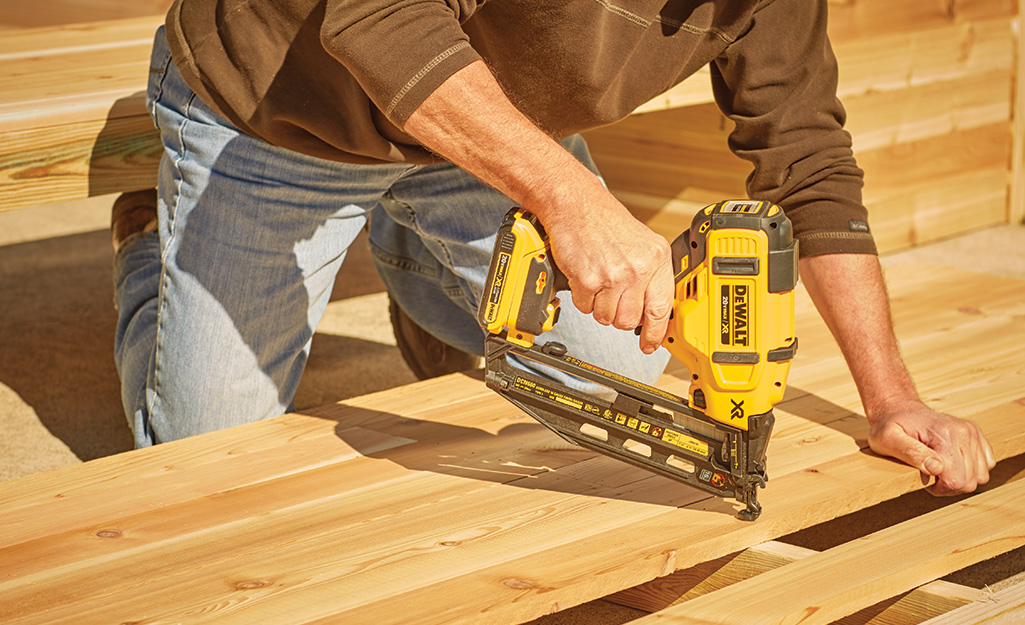
Nail Gun
9. Nailing Tips for Specific DIY Projects
Framing and Carpentry: Techniques for Constructing Sturdy Frames
Framing and carpentry projects often require strong and reliable connections to support the overall structure. Here are some key nailing techniques to ensure the durability and stability of your frames:
- Toe-Nailing: When framing, it’s common to use toe-nailing to secure joints at an angle. This involves driving nails diagonally through one piece of wood into another to create a strong connection. To do this, position the nail at an angle and aim it towards the center of the second piece of wood. This technique adds significant strength to the joint.
- Blocking: Blocking is a technique where you insert short pieces of wood between studs or framing members to create additional support. Use common nails or framing nails to secure the blocking, ensuring it’s flush with the adjacent pieces. This helps distribute loads evenly and reinforces the structure.
- Sistering: When dealing with damaged or weak framing members, sistering involves attaching a new piece of lumber to the side of the existing one to strengthen it. Use nails or screws to secure the sistered piece, ensuring a tight bond and adding structural integrity.
- Choosing the Right Nails: For framing projects, you’ll typically use common nails or framing nails. Common nails are suitable for general framing tasks, while framing nails are larger and ideal for heavy-duty applications. Ensure your nails are long enough to penetrate both pieces of wood and provide a solid connection.
- Spacing and Positioning: Properly space your nails when securing framing members. Follow building codes and guidelines to determine the recommended spacing. Additionally, be precise in positioning nails to avoid splitting the wood and ensure a tight fit between pieces.
Trim and Molding: Achieving Precision When Working with Delicate Moldings
Trim and molding work demands precision and finesse to create a polished, finished appearance. Follow these tips to achieve accurate nailing in trim and molding projects:
- Pilot Holes: To prevent delicate moldings from splitting, it’s advisable to create pilot holes before inserting nails. Drill small holes that are slightly narrower than the nail’s diameter. This ensures a clean and secure attachment without damaging the molding.
- Choose the Right Nails: For trim and molding, finishing nails are your best choice. They have a small head and are specifically designed for creating a seamless finish. Their slender profile minimizes the appearance of nail holes.
- Nail Set or Nail Punch: After driving finishing nails, use a nail set or nail punch to recess the nail head slightly below the surface of the trim or molding. This allows you to fill the indentation with wood putty, making the nail hole virtually invisible.
- Clamps and Supports: When attaching trim, use clamps and supports to ensure that the pieces fit snugly against the surface. This minimizes gaps and makes nailing more precise.
- Measure and Cut with Care: Precise measurements and accurate cuts are essential when working with trim and molding. Double-check your measurements before making cuts to avoid any discrepancies that may lead to improper nailing.
Furniture Building: Nailing in Furniture Construction
Building furniture requires a combination of strength and aesthetics. Proper nailing techniques can help you achieve both:
- Joinery Techniques: In furniture construction, various joinery techniques can be used alongside nailing, such as mortise and tenon joints or dovetails. Nails can provide additional reinforcement to these joints, ensuring a sturdy piece.
- Pre-Drilling: When assembling furniture, especially with hardwoods, pre-drill holes for the nails. This helps prevent wood from splitting and ensures that the nails go in smoothly.
- Finishing Nails: For most furniture projects, finishing nails work well. Their small size and minimal visibility make them suitable for creating a clean, refined appearance.
- Glue and Nails: Consider using wood glue in combination with nails for added strength. Apply glue to the joint, insert the nails, and clamp the pieces together until the glue dries.
- Counter-Sinking: After nailing, use a nail set or punch to counter-sink the nail heads slightly below the surface of the wood. This enables you to conceal the nail heads with wood putty, ensuring a seamless finish.
10. Finishing and Concealing Nails
Wood Putty and Fillers
When your project requires a polished, seamless finish, wood putty and fillers become your best friends. These materials are particularly useful when working on woodworking projects, furniture making, or trim installations. Wood putty, typically available in various shades to match different wood types, is a pliable substance that can be pressed into nail holes, gaps, or imperfections. It dries relatively quickly and can be sanded for a smooth surface. Fillers, on the other hand, are often used for larger gaps or defects and come in both water-based and solvent-based forms. To use wood putty or filler effectively, follow these steps:
a. Select a wood putty or filler that matches the color of your wood, or choose one that can be stained or painted to match. b. Clean the surface around the nail hole, removing any loose wood or debris. c. Use a putty knife or a similar tool to press the putty or filler into the nail hole, ensuring it’s level with the surrounding surface. d. Allow the putty or filler to dry completely, following the manufacturer’s recommendations. e. Sand the area to achieve a smooth, flush finish. If necessary, touch up with stain or paint to match the surrounding wood.
Techniques for Hiding Nails
Concealing nails is an art that adds a professional touch to your projects. Whether you’re working on carpentry, trim installation, or fine woodworking, the goal is to hide the evidence of nails, creating a clean and unblemished surface. Some techniques for hiding nails include:
a. Counter-sinking Nails: Counter-sinking is the process of driving nails slightly below the wood’s surface. This creates a depression that can be filled with wood putty or filler and then sanded smooth.
b. Blind Nailing: In situations where you can’t drive nails directly through the surface, like when attaching trim, blind nailing is a common method. Here, nails are driven through the edge of one piece of wood into the adjoining piece, concealing the nailheads from view.
c. Using Molding and Trim: When it’s suitable for your project, adding decorative molding or trim can be an elegant way to hide nailheads. The nails are driven through the trim and into the underlying material, leaving the nailheads obscured by the trim.
d. Wooden Plugs: For certain projects, wooden plugs can be used to cover nail holes. After driving a nail, you can insert a wooden plug of the same wood type into the hole, and then sand and finish it to match the surface.
11. Conclusion
In this comprehensive guide, we’ve delved into the world of nailing techniques for DIY projects, from selecting the right nails to concealing them seamlessly. By understanding the types of nails, the tools required, and the various nailing techniques, you can elevate your DIY craftsmanship to a professional level. The importance of preparation, safety measures, and accurate nailing cannot be overstated. From common nailing techniques to advanced methods like toe-nailing and dovetail nailing, you’ve learned a wide array of skills to handle diverse projects. Troubleshooting common nailing problems and specific nailing tips for various DIY projects have equipped you with valuable knowledge. And when it comes to that final, polished finish, you now have the expertise to use wood putty, fillers, and effective techniques for hiding nails. Armed with these skills and insights, you’re ready to tackle your DIY endeavors with confidence, achieving exceptional results and creating woodworking masterpieces. So, pick up your tools, start practicing, and let your creativity flourish.