Shedding Light on Workshop Brilliance
Welcome to the illuminated world of workshop brilliance! As any seasoned DIY enthusiast or professional tradesperson knows, the difference between a successful project and a near-miss disaster can often come down to one essential factor: lighting. In this enlightening journey, we’ll uncover why proper lighting is the unsung hero of your workshop, not just for aesthetics but for the very foundation of productivity and safety.
The Power of Proper Lighting: A Work of Art
Imagine your workshop as a blank canvas, waiting for your creative genius to paint it with precision and finesse. Now, picture that canvas bathed in a warm, inviting glow – every detail, nook, and cranny beautifully illuminated. This is the magic of proper lighting. It transforms your workspace into an efficient haven where projects become works of art.
Good lighting is your secret ingredient, whether you’re crafting intricate wooden masterpieces, fine-tuning a vintage car engine, or simply fixing that leaky faucet. It’s more than just a source of light; it’s the gateway to craftsmanship, where every stroke of the brush or turn of the wrench is a masterpiece in the making.
Shine Bright, Work Right: The Impact of Good Lighting
Now, you might wonder, “Why make such a fuss about lighting?” The answer lies in the undeniable impact it has on two crucial aspects of your workshop life: productivity and safety.
- Productivity: Proper lighting is your steadfast ally in the battle against procrastination and inefficiency. It energizes your workspace, awakens your creative senses, and lets you work for longer hours without straining your eyes. No more squinting, no more guesswork – just pure, uninterrupted productivity.
- Safety: Safety first, right? Indeed, good lighting is your guardian angel against the lurking hazards of your workshop. It helps you spot potential dangers, like loose screws, sharp tools, or frayed wires. In a well-lit environment, you’re less likely to trip, stumble, or overlook important safety precautions. Plus, with proper lighting, emergency exits are more visible, and you can respond swiftly in case of unexpected mishaps.
So, as you embark on this illuminating journey through the world of workshop lighting, keep in mind that it’s not just about illuminating your space; it’s about illuminating your path to success. Ready to shed light on your workshop’s full potential? Let’s explore the various facets of lighting that will make your projects shine brighter and keep you safer than ever before!
Types of Workshop Lighting: Shedding Light on Your Workspace
Whether you’re crafting fine woodwork, tinkering with mechanical wonders, or delving into intricate DIY projects, the right kind of workshop lighting can make all the difference in the world. It’s not just about chasing away those ominous shadows but also creating an environment where your creativity and craftsmanship can truly shine. In our workshop lighting guide, we’re ready to illuminate the options and help you craft your ideal workspace.
Natural Lighting: Sun-Kissed Workspaces
Let’s start with the most radiant of them all – natural lighting. There’s something undeniably magical about working under the gentle caress of sunlight. If your workshop is fortunate enough to have windows, make the most of them! Natural light not only minimizes energy consumption but also provides superior color rendering, allowing you to see your materials in their truest form. Position your workstations near windows to bask in the beauty of natural lighting. And hey, it’s an excellent mood booster too!
Artificial Lighting: Illuminating the Night
Now, when the sun bids adieu, or if your workshop is nestled in the depths of a garage, artificial lighting comes to the rescue. Artificial lighting is your trusty sidekick in the workshop world. It’s divided into three categories – Overhead Lighting, Task Lighting, and Accent Lighting.
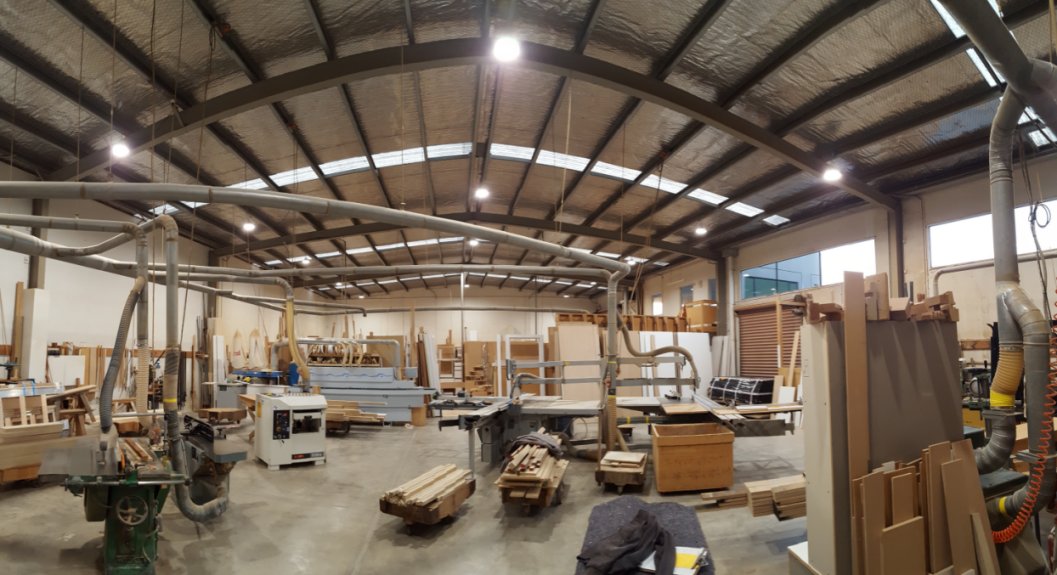
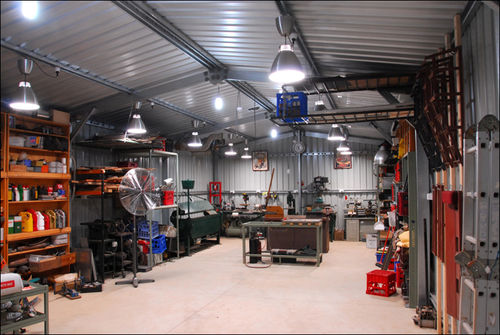
Overhead Lighting: The Master of Ambience
The grand conductor of illumination in your workshop, overhead lighting sets the stage for your entire workspace. It’s like the sun in the sky, only much closer. You’ll find various options here, from fluorescent tubes to LED panels. They ensure that the entire area is well-lit and shadows don’t play mischief with your work. Opt for fixtures strategically placed across your workshop ceiling to ensure uniform light distribution. And don’t forget to consider the color temperature of the bulbs, which can significantly impact the ambiance.
Task Lighting: Precision at Your Fingertips
Task lighting is your spotlight, your trusty assistant that brightens up the exact spot where the magic happens. Whether you’re examining the tiniest of details, soldering intricate circuits, or hand carving a masterpiece, task lighting is your beacon of precision. These fixtures come in the form of desk lamps, clamp-on lights, or even magnifying lamps for those delicate tasks. They make sure you don’t miss a single detail, and your work is as accurate as it gets.
Accent Lighting: The Artist’s Touch
In the world of workshop lighting, accent lighting is like a painter’s brush, adding a touch of drama and flair to your workspace. It’s not about the quantity of light but the quality. Use accent lighting to draw attention to specific elements in your workshop, such as a cherished tool collection or a piece of art. LED strips, spotlights, and even stylish pendant lights can add a touch of personality and highlight the areas that deserve a spotlight.
So, there you have it! A comprehensive overview of the types of workshop lighting. Natural lighting brings in the charm of the outdoors, while artificial lighting takes center stage when the sun retreats. Overhead lighting casts a wide net of illumination, task lighting offers precision, and accent lighting adds an artistic flair to your workshop. When you master the interplay of these lighting types, you create a workspace that’s not just functional but also a beacon of inspiration. With the right lighting, your creativity knows no bounds!
Understanding Light Bulbs: Shedding Light on the Options
Light bulbs have come a long way since the days of Thomas Edison’s incandescent bulb. Nowadays, when it comes to lighting your workshop, you’re faced with a smorgasbord of choices. So, let’s take a moment to unravel the illuminating world of light bulbs and understand what makes each type tick.
LED, Fluorescent, Incandescent, Oh My!
LED (Light Emitting Diode): LEDs are like the rock stars of the lighting world. They’re incredibly energy-efficient, offering a bright, focused light while sipping electricity like it’s the finest aged wine. These bulbs have a longer lifespan than most other options, ensuring they’ll be your work buddy for years to come.
Fluorescent: Think of fluorescent bulbs as the seasoned pros. They’ve been lighting up offices, garages, and workshops for ages. While not as efficient as LEDs, they still manage to do their job well. Their color temperature is typically on the cooler side, giving off that classic white light that’s great for precision tasks.
Incandescent: Ah, the classic, warm, and familiar incandescent bulbs. They’ve been around forever, and their warm, cozy glow is like a hug from your workshop. However, they’re energy hogs and have a shorter lifespan compared to LEDs or fluorescents. Not the best option if you’re trying to be energy-conscious.
Choosing the Right Lighting for Your Workshop: Let There Be Enlightenment
Now that you’ve got a handle on your light bulb options, let’s dive into choosing the right lighting for your workshop. This is where the magic happens, where your workspace goes from dim and dreary to bright and brilliant.
Assessing Workshop Size and Layout: Your workshop’s dimensions are like the canvas on which you’re about to create a masterpiece. Large workshops might need several light sources to ensure every corner is well-lit. Smaller spaces may get by with fewer fixtures. Consider your ceiling height, wall colors, and any obstacles that might affect light distribution. You’re the artist, and your workshop is your canvas.
The Brightness Balancing Act: How bright is bright enough? It’s a crucial question because inadequate or excessive brightness can harm your productivity and your eyes. LED lights often come in various lumens, so you can adjust your brightness according to your needs. For general lighting, a good rule of thumb is 20 lumens per square foot, but task areas might need more oomph.
Color Temperature and CRI: If you’re a woodworker, you know that the perfect finish hinges on getting the wood’s color just right. The same goes for lighting. Color temperature, measured in Kelvins, is all about the mood. Cooler light (higher Kelvins) mimics natural daylight and is great for task areas. Warmer light (lower Kelvins) lends a cozy atmosphere. The Color Rendering Index (CRI) rates how accurately the light reveals the true colors of objects. For precise tasks, aim for a high CRI, so you don’t accidentally end up with that turquoise instead of teal.
Specialized Lighting for Specific Tasks: Woodworking and metalworking aren’t quite the same game. The tools and materials used in these trades have different lighting needs. Metalworkers, for instance, may require brighter, cooler lights to detect imperfections, while woodworkers might prefer warm, even lighting to bring out the richness of the wood. It’s all about tailoring the light to the task. Think of it like a chef picking the perfect spice for a dish; each task has its own flavor profile.
So there you have it, a little enlightenment on your workshop’s illumination. Armed with the knowledge of different light bulb types and the factors to consider, you’re one step closer to creating the ideal lighting scheme that will not only brighten up your workspace but also enhance your craftsmanship. Happy lighting! 🌟💡
Installation and Placement: Shedding Light on the Art of Illumination
Now that you’ve made the wise decision to illuminate your workshop, let’s delve into the nitty-gritty of installation and placement. After all, what good are the finest lights if they’re shining in all the wrong places?
Proper Placement of Overhead Lights:
Imagine overhead lights as the celestial bodies of your workshop galaxy. They cast a uniform glow that ensures your entire workspace is bathed in the gentle radiance of knowledge, safety, and creativity. But where exactly should you position these heavenly luminaries? The answer is simple: right above your head! Overhead lighting should be installed strategically to prevent shadows and harsh contrasts. For most workshops, a central placement does wonders. However, you may need additional fixtures if you have specialized work areas.
Task Lighting for Workbenches and Tool Areas:
Now, let’s spotlight your workbenches and tool areas. These are the true heroes of your workshop, where masterpieces come to life, and every nut and bolt is meticulously scrutinized. Task lighting is your loyal sidekick here, illuminating your workstations with precision. Angle-adjustable desk lamps or under-cabinet lighting can turn any ordinary workbench into a stage where your craftsmanship takes center stage. Remember, it’s all about eliminating shadows, so your handiwork remains the star of the show.
Considerations for Even Light Distribution:
In the quest for the perfect workshop lighting, even light distribution is your ultimate treasure. No shadows, no dark corners – just a well-lit sanctuary of creativity. Achieving this is an art in itself. Start by ensuring that your overhead lights are evenly spaced. Calculate the distance based on the fixture’s size and lumens output. Don’t forget to factor in the reflective properties of your workshop’s surfaces; some might need more light love than others.
Lighting Controls: Where Magic Meets Convenience
Now, let’s talk about the magician’s wand of lighting: controls. Lighting controls can make your life in the workshop easier, more efficient, and, dare we say, a little more magical.
Dimmers and Timers for Flexibility and Energy Savings:
Enter dimmers and timers, the enchanters of lighting flexibility. With dimmers, you can adjust the brightness to your heart’s content. Need that intense beam to conquer intricate details? Crank it up. Want a mellow atmosphere for brainstorming or relaxation? Dial it down. This not only caters to your lighting preferences but also saves energy. Timers, on the other hand, are your personal timekeepers. Set them to turn off the lights automatically after a set period, so you never have to worry about accidentally leaving them on overnight.
Motion Sensors for Hands-Free Operation:
But what if you could take it a step further and make your workshop respond to your presence like a trusty sidekick? That’s where motion sensors come into play. These technological marvels can detect your movement and illuminate your path without you lifting a finger. Imagine carrying a heavy piece of lumber or a delicate glasswork project. With motion sensors, you won’t need to fumble for a switch. It’s like the lights whispering, “We’ve got you.”
In the realm of workshop lighting, installation and controls are the final strokes on your masterpiece. Proper placement and the right controls ensure that your workshop is not just well-lit but also a sanctuary of creativity, productivity, and energy efficiency. So go ahead, shine a light on your work, and let your workshop’s magic illuminate your imagination!
Energy Efficiency: Shining a Light on Savings
Let’s face it, electricity doesn’t grow on trees (unfortunately). That’s why it’s vital to explore energy-efficient lighting options that not only help save money but also reduce your carbon footprint. So, let’s roll up our sleeves and dive into the world of illuminating eco-friendliness.
Energy-Saving Options:
The Switch to LEDs: LED lights are like the superheroes of the lighting world. They consume significantly less power than traditional incandescent bulbs and can last 25 times longer. Not only will you see a difference in your energy bills, but you’ll also reduce the frequency of changing light bulbs.
Fluorescent Fix: Compact fluorescent lights (CFLs) are another eco-friendly option. They’re not as energy-efficient as LEDs, but they still outshine incandescents when it comes to energy savings. Plus, they emit less heat, keeping your workshop cooler.
Smart Illumination: Invest in smart lighting systems that allow you to control your workshop lights remotely. You can easily turn off or dim lights when not in use, ensuring you’re not wasting precious watts.
Tips for Energy Consumption Reduction:
Unleash the Power of Natural Light: Whenever possible, make use of natural daylight. Position your workbenches or tools near windows to capitalize on this free and eco-friendly source of light.
Zoning and Task Lighting: Instead of lighting up your entire workshop like a football stadium, use zoning and task lighting. Illuminate only the areas where you’re working, reducing overall energy consumption.
Upgrade to Motion Sensors: Installing motion sensors is like having a personal assistant for your lighting. Lights automatically turn on when you enter a zone and switch off when you leave, minimizing wastage.
Maintenance and Safety: Shedding Light on Safety and Longevity
Now that you’ve set up an efficient lighting system, let’s not forget the importance of keeping it in tip-top shape. Proper maintenance and safety measures will not only extend the life of your lighting but also protect you and your workshop.
Regular Cleaning and Bulb Replacement:
Your lights work hard for you, and they deserve a little TLC in return. Dust, grime, and debris can accumulate on bulbs and fixtures, reducing their efficiency. Regularly clean bulbs and fixtures to keep them shining bright.
Scheduled bulb replacement is equally important. Even the longest-lasting LEDs will eventually burn out, and replacing them in a timely manner ensures you’re not working in the dark.
Ensuring Electrical Safety and Compliance:
Safety should always be your top priority. When working with electricity, make sure you:
- Check for Frayed Wires and Damaged Fixtures: Regularly inspect the wiring and fixtures for signs of wear and tear. Frayed wires or damaged fixtures can lead to electrical hazards.
- Properly Ground Electrical Connections: Grounding your electrical connections prevents electrical shocks. Ensure all your lighting systems are grounded as per local electrical codes.
- Use Surge Protectors: Protect your workshop from power surges by using surge protectors. They shield your equipment and lighting systems from voltage spikes that can cause damage.
Lighting Upgrades and Innovations
Is your workshop still stuck in the dark ages, with flickering fluorescent tubes and outdated fixtures? It’s time to bring your workspace into the 21st century with smart lighting solutions and explore the exciting trends in workshop lighting technology.
Smart Lighting Solutions for Workshops:
Remember the days when you had to manually flip switches or fumble for a pull chain to illuminate your workspace? Those days are long gone, thanks to smart lighting solutions. Imagine walking into your workshop, and the lights automatically turn on as if they know you’re there. It’s not magic; it’s technology at its finest.
- Motion Sensors: Smart motion sensors can be installed throughout your workshop, ensuring that lights activate when they detect your presence and switch off when you leave. No more wasted energy or fumbling for switches while your hands are full of tools.
- Voice Control: Want to impress your friends with a “James Bond workshop”? Use voice-activated lighting systems like Amazon Alexa or Google Home to control your workshop’s lighting with a simple command. “Lights on!” And voila, your workshop is bathed in brilliance.
- App Control: From your smartphone or tablet, you can adjust the brightness, color, and even set lighting schedules. You can program the lights to simulate natural daylight, making your workshop feel like an open-air oasis even in the dead of winter.
Trends in Workshop Lighting Technology:
The world of workshop lighting is evolving rapidly, and staying up to date with the latest trends can significantly enhance your workspace.
- LED Revolution: LED technology has taken over the lighting world with its energy efficiency, long lifespan, and versatility. Modern LED lights provide bright, consistent illumination without the heat or flicker of traditional bulbs.
- Tunable White Lighting: This innovative trend allows you to adjust the color temperature of your lights, mimicking natural daylight. This can be a game-changer when working on projects that require accurate color rendering.
- High CRI (Color Rendering Index) Lighting: High CRI LEDs offer better color accuracy, ensuring that you see your workpieces in their true colors. This is a must for artisans and professionals who demand precision.
- Wireless Control: Say goodbye to tangled cords and complex wiring. Wireless lighting systems are becoming increasingly popular, making installation and control a breeze.
Case Studies and Examples
A picture is worth a thousand words, and when it comes to showcasing the impact of good lighting in workshops, these case studies and before-and-after scenarios will leave you speechless.
Case Studies:
Imagine a cluttered, dimly lit garage workshop transformed into a well-organized, brightly illuminated sanctuary of creativity. In our case studies, we dive deep into real-life workshop makeovers. We explore how these spaces went from gloomy to glorious with the right lighting solutions.
We’ll introduce you to passionate DIYers, hobbyists, and professionals who have harnessed the power of modern lighting technology to create functional and inspiring workshops.
Before-and-After Scenarios:
Seeing is believing, right? We present you with dramatic visual evidence of what proper lighting can do for your workshop. In the “before” photos, you’ll find dark, shadowy spaces with limited functionality. Then, we’ll unveil the “after” shots, where these same spaces are brought to life with brilliant, evenly distributed light.
You’ll be amazed at how the right lighting can make your tools and materials pop with clarity, how it can banish those intimidating shadows, and how it can transform your workshop from a dingy cave into a well-lit haven of productivity.
So, get ready to be inspired and enlightened by these real-world examples of workshop lighting success stories. By the end, you’ll be eager to apply the same lighting magic to your own workshop, enhancing its functionality and aesthetics.
DIY Workshop Lighting Projects: Shedding Light on Your Creativity
Have you ever stared at your workshop, only to realize that the lighting situation is far from ideal? Worry not, because in this section, we’re diving headfirst into the world of do-it-yourself (DIY) workshop lighting projects. It’s time to illuminate your workspace in a way that’s not just functional but also uniquely yours.
Why Go DIY?
Before we unleash your inner craftsman or craftswoman, you might wonder, “Why go the DIY route when I can just buy off-the-shelf lighting solutions?” Well, DIY lighting projects offer a bunch of perks. First, they allow you to tailor the lighting to your specific needs, and second, they let you unleash your creativity in a way that store-bought fixtures simply can’t. Plus, there’s the added satisfaction of saying, “I made this!” every time you flip the switch.
DIY Lighting Ideas: Get Inspired
Let’s kickstart the inspiration with a few DIY lighting project ideas that can add a dash of personality to your workspace:
1. Mason Jar Pendant Lights:
-
- These rustic-chic fixtures can give your workshop a cozy, vintage vibe. All you need are mason jars, light sockets, and some creativity to assemble your own pendant lights.
2. Pipe Lamp:
-
- Industrial-style lighting is all the rage, and you can create your own with black iron pipes. Build a custom lamp that not only provides illumination but also acts as a conversation piece.
3. LED Strip Lighting:
-
- This is a versatile option that allows you to play with colors and even sync the lighting with your music. It’s perfect for adding ambiance and a touch of modernity to your workspace.
4. Reclaimed Wood Chandeliers:
-
- Turn scrap wood into a work of art. A chandelier made from reclaimed wood can infuse your workshop with rustic charm and warmth.
Step-by-Step Instructions: Let’s Get Crafty!
Now that your creative sparks are flying, it’s time to roll up your sleeves and dive into a DIY lighting project. We’re going to guide you through the process of creating a mason jar pendant light, a charming addition to any workshop.
Materials You’ll Need:
- Mason jars (any size or style you prefer).
- Light sockets (available at most hardware stores).
- Electrical cord with a plug.
- Light bulbs (LEDs for energy efficiency).
- Ceiling hook or mounting hardware.
Step 1: Assemble Your Tools:
-
- Gather your tools: screwdriver, wire cutters, pliers, and a drill. Safety goggles are a must, too.
Step 2: Prepare the Jars:
-
- Remove any labels and clean the mason jars thoroughly. You can get creative by painting or decorating them if you’d like.
Step 3: Drill the Lid:
-
- Use a drill to create a hole in the metal lid of the mason jar. The hole should be just big enough to fit the light socket through.
Step 4: Wiring:
-
- Thread the electrical cord through the hole in the lid and attach it to the light socket following the manufacturer’s instructions. Make sure to secure the connections.
Step 5: Hang It Up:
-
- Mount a hook or other hardware on the ceiling where you want your pendant light to hang. Hang the mason jar by the cord and plug it into an electrical outlet.
Step 6: Enjoy Your Handiwork:
-
- Screw in an LED bulb and turn on your mason jar pendant light. Bask in the warm, welcoming glow of your DIY creation.
Whether you’re an experienced DIY enthusiast or a beginner looking to dive into the world of crafting, these projects will not only brighten your workspace but also add a personal touch to your creative haven. So, grab your tools, let your imagination run wild, and let there be light!
In the ever-evolving realm of workshop illumination, it’s clear that your choices extend far beyond a simple flick of a light switch. From understanding the nuances of lighting types to mastering the art of installation and maintenance, you’ve embarked on a journey to transform your workspace. And for the intrepid DIYers among us, the allure of crafting your own unique lighting fixtures presents a world of creativity, personalization, and satisfaction. So, as we wrap up this enlightening guide to workshop lighting, remember that good lighting isn’t just about functionality; it’s about enhancing your workspace, boosting productivity, and making it uniquely yours. Whether you opt for store-bought solutions or embark on DIY adventures, your workshop will be all the brighter for it. It’s time to shine and let your workspace truly dazzle.