Why have DIY Plumbing Tools?
- Cost-Efficiency: One of the primary reasons for tackling plumbing issues yourself is the significant cost savings. Hiring a professional plumber can be expensive, especially for minor repairs or routine maintenance. DIY plumbing tools allows homeowners to save money that can be better invested elsewhere.
- Empowerment: DIY plumbing empowers homeowners to take control of their living spaces. By learning basic plumbing skills, individuals can address issues promptly, reducing the stress and inconvenience associated with plumbing problems.
- Learning and Skill Development: DIY plumbing is an opportunity for homeowners to acquire new skills. Understanding the fundamentals of plumbing not only helps in emergencies but also opens doors to various home improvement projects.
- Timely Solutions: DIY plumbing enables homeowners to respond quickly to plumbing issues, preventing them from escalating into more significant and costly problems. This timely response can also prevent property damage.
Necessity of Having the Right Tools
- Tool Versatility: Having a well-equipped toolbox is crucial because plumbing tasks vary in complexity. The right tools can make any plumbing job more manageable, from a simple clog removal to more complicated repairs.
- Efficiency: Using the appropriate tools for the job not only ensures that tasks are completed correctly but also helps save time and effort. DIY plumbers can complete projects more efficiently when they have the right tools at their disposal.
- Safety: The correct tools also contribute to safety. Using improper tools or makeshift solutions can lead to accidents or damage. Highlight how using the right tools reduces risks and provides peace of mind.
- Quality Work: Proper tools contribute to the quality of the work. A well-executed DIY plumbing project not only solves the immediate issue but also ensures long-term functionality, preventing the need for constant repairs.
Basic Plumbing Tools
Plumbing tasks in your home can range from simple fixes like a dripping faucet to more complex issues such as repairing or replacing pipes. Having the right basic plumbing tools is essential for tackling these DIY projects effectively. In this section, we will explore a range of essential tools that every homeowner should consider having in their plumbing toolbox.
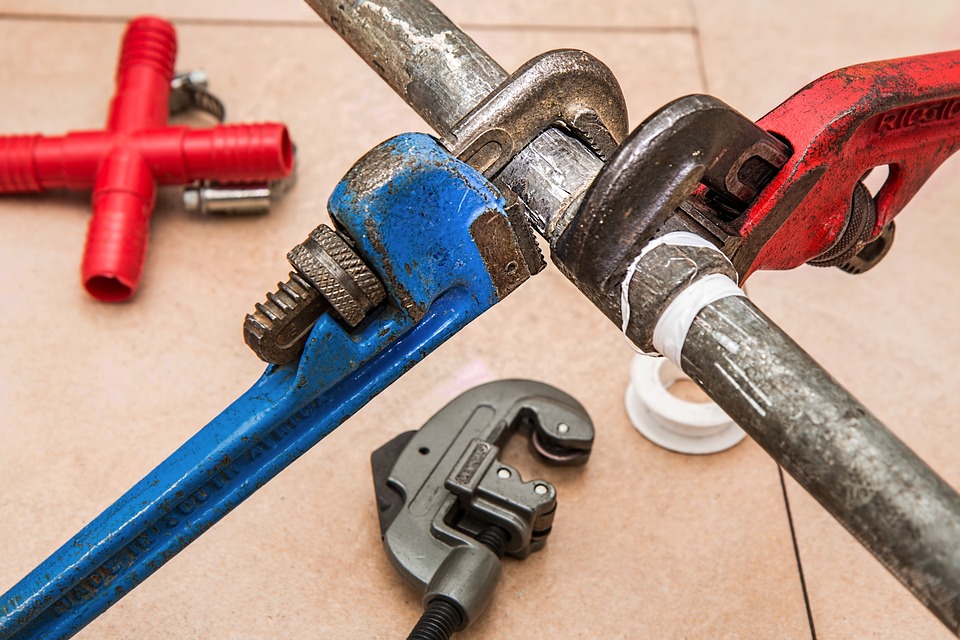
Pipe Wrench
- Description and Types: Pipe wrenches are one of the most recognizable plumbing tools. They come in several types, including the straight pipe wrench, end pipe wrench, and offset pipe wrench. These tools are made of heavy-duty steel and have serrated jaws designed to grip and turn pipes.
- Common Uses: Pipe wrenches are used for turning and gripping pipes, fittings, and other plumbing components. They are indispensable for tightening or loosening threaded pipes, making them a must-have for any plumbing repair or installation job.
Adjustable Wrench
- Description and Uses: Adjustable wrenches, also known as crescent wrenches, are versatile tools with an adjustable jaw size. They come in various sizes, and it’s essential to have a set of them in different sizes to handle different plumbing fittings. These wrenches have a smooth jaw, which makes them suitable for use on fixtures without damaging them.
- Ideal Sizes: Having adjustable wrenches in various sizes, such as 6-inch, 10-inch, and 12-inch, ensures that you can handle a variety of plumbing connections from small nuts to larger fittings.
Plunger
- Types and When to Use Them: Plungers come in two primary types: cup plungers and flange plungers. Cup plungers are ideal for sinks and flat drains, while flange plungers are better suited for toilets with curved drains. Knowing when and how to use each type is crucial for effective plunging.
- Proper Plunging Technique: To effectively use a plunger, ensure that there is enough water to cover the cup or flange. Place it over the drain, creating a seal, and push and pull in a steady motion to dislodge clogs. For toilets, make sure the plunger covers the entire drain opening.
Pipe Cutter
- Types and Applications: Pipe cutters come in different types, including wheel cutters and ratcheting cutters. They are essential for cleanly cutting pipes, allowing you to replace or repair sections of plumbing lines.
- How to Use a Pipe Cutter: When using a pipe cutter, mark the section you want to cut and then rotate the cutter around the pipe. Apply consistent pressure until the pipe is severed. Make sure the cut is straight and clean, as this will help ensure leak-free connections when you fit new pipes or connectors.
Tongue-and-Groove Pliers (Channellocks)
- Description and Uses: These pliers have serrated jaws and an adjustable design, making them versatile for gripping and turning various plumbing components, such as nuts, bolts, and pipes. They are excellent for providing a secure grip and can handle a range of sizes.
- Ideal Sizes: Having a set of tongue-and-groove pliers in different sizes, such as 10-inch and 12-inch, ensures versatility when working on plumbing projects.
Basin Wrench
- Description and Uses: A basin wrench is specifically designed for working on faucets and other fixtures in tight spaces, such as under sinks. It has a long, adjustable handle and a swiveling jaw that allows you to reach and tighten connections that would be otherwise challenging to access.
- Applications: Basin wrenches are perfect for tightening or loosening nuts on faucet supply lines and mounting nuts on sinks.
Teflon Tape (Thread Seal Tape)
- Description and Uses: Teflon tape is a thin, white tape that is used to seal threaded connections. It helps prevent leaks by creating a watertight seal between threaded pipes and fittings. Teflon tape is a crucial component for ensuring leak-free connections.
Hacksaw
- Description and Uses: A hacksaw is a small, handheld saw with a fine-toothed blade. It is used for cutting pipes and other plumbing materials. When you need to make precise cuts, a hacksaw is an essential tool.
- Proper Usage: To use a hacksaw, mark the section to be cut, secure the pipe or material, and then saw through it using even, back-and-forth strokes. It’s important to use a new, sharp blade to ensure clean cuts.
Plumbers Tape Measure
- Description and Uses: A specialized tape measure for plumbing typically features both standard measurements and metric units. It’s useful for taking precise measurements when cutting or fitting pipes.
- Tips for Accurate Measurements: When using a plumber’s tape measure, ensure it’s taut, and take measurements from the end of the tape. Double-check your measurements before making any cuts to avoid errors.
Hex Key Set (Allen Wrench Set)
- Description and Uses: Hex keys, often referred to as Allen wrenches, are used for tightening or loosening hexagonal socket screws and bolts. They are commonly found in faucet handles and other fixtures.
- Applications: Hex keys are essential for removing handles on faucets, showerheads, and various plumbing fixtures.
Bucket
- Description and Uses: A sturdy bucket is an often-overlooked but invaluable plumbing tool. It’s used to catch water and debris when disassembling pipes or working on drains, ensuring a tidy work area and preventing water damage.
- Applications: Use a bucket to catch water when removing P-traps, cleaning out drains, or addressing any plumbing-related spills.
Including these tools in your plumbing arsenal will empower you to tackle a wide range of basic plumbing issues in your home. By providing a detailed understanding of each tool’s description, types, common uses, and practical tips, homeowners can approach plumbing tasks with confidence and competence.

Advanced Plumbing Tools
Pipe Threader
- Description and UsesPipe threaders are essential tools used for cutting threads into pipes. This threading process allows for the secure connection of pipes and fittings. Here’s a more detailed look at the description and uses of pipe threaders:
a. Description:
- A pipe threader is a handheld or machine-operated tool designed to create external threads on the ends of pipes.
- It consists of a handle, a ratcheting mechanism, and a die head with cutting dies that match the pipe’s size and thread specifications.
- Pipe threaders come in various sizes to accommodate different pipe diameters.
b. Uses:
- Creating threaded ends on pipes for assembling and joining plumbing systems, such as gas lines and water supply lines.
- Essential for connecting pipes, pipe fittings, and valves securely.
- Common applications include joining steel pipes and gas lines.
- Thread Sealing TechniquesWhen working with threaded pipes, it’s crucial to ensure they are not only securely connected but also leak-proof. To achieve this, proper thread sealing techniques are essential:
a. Thread Sealants:
- Use pipe thread sealants or pipe thread tape (Teflon tape) on the threaded joints to prevent leaks.
- Apply a thin layer of sealant or wrap the tape in the direction of the threads to create a tight seal when the pipes are screwed together.
b. Tightening:
- Tighten the threaded connections firmly, but avoid over-tightening, which can damage the threads or fittings.
- Always follow the manufacturer’s recommendations for torque values, especially when working with materials like steel or copper.
c. Pressure Testing:
- Before using the threaded pipe in your plumbing system, conduct a pressure test to check for leaks. This ensures the connections are secure and leak-free.
Pipe Snake or Auger
- Types and When to Use ThemPipe snakes, also known as plumbing augers, are tools designed to clear blockages or obstructions within pipes. There are different types of pipe snakes, each suited for specific applications:
a. Hand-Cranked Drain Auger:
- Description: This is a manually operated tool with a flexible, coiled cable and a handle that you turn by hand.
- Use: Ideal for small drain blockages in sinks, bathtubs, and showers. It can navigate through bends and traps.
b. Power Drain Auger:
- Description: These are motorized drain augers, usually handheld or mounted on a stand, with a rotating cable.
- Use: Suitable for tougher clogs in main sewer lines and larger pipes due to their increased power.
- How to Operate a Pipe SnakeProper operation of a pipe snake is essential for effective and safe blockage removal:
a. Preparation:
- Wear protective gear, including gloves and safety glasses, to shield yourself from debris and splashes.
b. Insertion:
- Insert the snake into the blocked pipe or drain, making sure it advances smoothly.
c. Rotating or Cranking:
- For a hand-cranked drain auger, turn the handle clockwise to advance the cable, and counter-clockwise to retract it.
- Power drain augers have a motor that rotates the cable; control its speed and direction as needed.
d. Break the Blockage:
- As the snake reaches the clog, use steady pressure to break it up. Be patient and avoid forcing the snake, which can damage the pipe.
Propane Torch and Solder
- Soldering for Pipe RepairsSoldering is a technique used to join copper pipes, fittings, and valves. The propane torch and solder are indispensable tools for this process:
a. Propane Torch:
- Description: A handheld torch that burns propane or a similar fuel to produce a high-temperature flame.
- Use: Heat source for soldering copper pipes.
b. Solder:
- Description: Solder is a low-melting-point metal alloy (usually a mixture of tin and lead) used to create a watertight seal between copper pipe joints.
- Use: Applied to the joint while heated, it forms a strong bond as it cools and solidifies.
- Safety PrecautionsWhen using a propane torch and solder for plumbing repairs, safety should be a top priority:
a. Ventilation:
- Ensure adequate ventilation in the workspace to prevent the accumulation of fumes.
- Use the torch in well-ventilated areas to avoid inhaling potentially harmful gases.
b. Fire Safety:
- Keep a fire extinguisher nearby as a precaution.
- Clear the workspace of flammable materials and provide a fire-resistant work surface.
c. Protective Gear:
- Wear heat-resistant gloves, safety glasses, and flame-resistant clothing to protect yourself from burns.
d. Lead-Free Solder:
- In many regions, it’s best to use lead-free solder for health and environmental reasons.
- Follow local regulations and guidelines regarding solder composition.
e. Follow Manufacturer Instructions:
- Always adhere to the manufacturer’s guidelines for the specific propane torch and solder you are using.
By understanding the advanced plumbing tools and following the recommended techniques and safety precautions, homeowners can confidently handle more complex plumbing tasks.
Measuring and Leveling Tools
Measuring and leveling tools are indispensable when it comes to DIY plumbing projects. They ensure precision and accuracy, critical for proper pipe installation, alignment, and overall project success. In this section, we will delve into two key tools: the tape measure and the spirit level.
Tape Measure
- Uses in Plumbing:a. Pipe Length Measurement: One of the most common uses of a tape measure in plumbing is to measure the length of pipes or tubes. This is crucial for selecting the right size pipes and ensuring they fit perfectly.
b. Spacing and Clearance: A tape measure is essential for determining the spacing between fixtures, like sinks and toilets, and for ensuring there is sufficient clearance for pipes, especially in tight spaces like under sinks.
c. Center-to-Center Measurements: When installing fixtures or hanging brackets, knowing the center-to-center measurements helps ensure alignment and balance.
d. Room Layout Planning: In larger plumbing projects, a tape measure is valuable for planning the layout of an entire room. This includes marking the exact position of pipes, fixtures, and other components.
-
Tips for Accurate Measurements:
a. Start at the Hook: Begin measuring from the end of the tape measure, which usually has a metal hook. This helps you accurately measure from the starting point.
b. Tension and Straightness: Keep the tape measure taut and as straight as possible. This reduces the risk of inaccuracies due to sagging or bending.
c. Read Clearly: Make sure to read the measurement at eye level to avoid parallax errors. These errors occur when you read the measurement from an angle, leading to inaccuracies.
d. Double-Check: For critical measurements, double-check to ensure accuracy. Even the smallest error can cause problems in plumbing projects.
Spirit Level
- Importance in Plumbing Projects:a. Ensuring Proper Slope: Spirit levels are essential in plumbing to ensure proper drainage. For example, when installing a shower or sink, you need to ensure a slight slope toward the drain to prevent water pooling.
b. Horizontal and Vertical Alignment: Proper alignment is vital in plumbing. A spirit level helps ensure that pipes are installed horizontally or vertically, which is crucial for water flow and structural integrity.
c. Balancing Fixtures: When installing fixtures like faucets or showerheads, a spirit level ensures that they are mounted level and look aesthetically pleasing.
- How to Use a Spirit Level Correctly:a. Select the Right Spirit Level: There are different spirit levels for different purposes, including short levels for small tasks and longer levels for broader measurements. Choose the appropriate level for your project.
b. Clean the Surface: Before placing the spirit level, make sure the surface is clean and free from debris, which can affect the accuracy of the reading.
c. Place the Level: Position the spirit level on the surface you want to measure, ensuring it makes full contact. Hold it steady and observe the bubble in the level’s vial.
d. Adjust the Bubble: If the bubble isn’t centered, adjust the surface or the fixture you’re working on until the bubble is centered. This indicates that the surface is level.
e. Double-Check and Cross-Check: To ensure accuracy, cross-check measurements with multiple spirit levels, especially for critical projects where precision is essential.

Safety Equipment
Safety equipment is a crucial component of any DIY plumbing toolkit, ensuring that you can carry out your tasks with minimal risk. In this section, we’ll delve into the various safety tools you should consider adding to your collection.
Safety Glasses
- Eye Protection in Plumbing Worka. Importance of Eye Protection:
- Plumbing work often involves using tools like saws, drills, and pipe cutters, which can generate debris and sparks. Moreover, while working on pipes, there is a risk of pressurized water or chemicals splashing into your eyes. Safety glasses are designed to protect your eyes from these potential hazards.
- Your eyes are delicate and vulnerable, and even small particles or chemicals can cause significant damage. Safety glasses act as a barrier, safeguarding your vision.
b. Types of Safety Glasses:
- Wraparound Safety Glasses: These provide full coverage and shield your eyes from all angles. They are ideal for plumbing work where debris might be coming from different directions.
- Anti-Fog Coating: Plumbing environments can be humid, causing regular glasses to fog up. Anti-fog safety glasses maintain clear visibility.
- Impact Resistance: Look for glasses that are ANSI Z87.1 certified for impact resistance, ensuring they can withstand flying debris.
c. Proper Usage:
- Always wear safety glasses when working on plumbing projects, even if the task seems low-risk.
- Ensure a snug fit to prevent debris from getting behind the glasses.
Gloves
- Hand Protection and Types of Glovesa. Importance of Hand Protection:
- Plumbing work often involves handling rough or sharp materials, chemicals, and hot pipes. Protecting your hands is essential for both safety and comfort.
- Gloves also provide insulation against cold water and can minimize the risk of cuts and abrasions when working with tools.
b. Types of Gloves:
- Nitrile Gloves: These are resistant to chemicals and offer good dexterity. They are suitable for tasks involving potentially harmful chemicals.
- Leather Gloves: Leather gloves are durable and provide protection against cuts and abrasions. They are ideal for handling rough materials and working with tools.
- Heat-Resistant Gloves: When working on hot water lines or using a propane torch, heat-resistant gloves are a must to prevent burns.
- Insulated Gloves: For cold water applications, insulated gloves will keep your hands warm and functional.
c. Proper Usage:
- Choose the appropriate glove for the specific task at hand. For instance, wear heat-resistant gloves when soldering pipes, and chemical-resistant gloves when handling hazardous substances.
- Ensure a proper fit to maintain dexterity and grip.
Ear Protection
- Reducing Noise-Related Risksa. Importance of Ear Protection:
- Plumbing tasks often involve loud machinery and tools like drills, saws, and pipe threaders. Prolonged exposure to this noise can lead to hearing damage or loss.
- Ear protection is essential to safeguard your hearing and overall well-being during and after your plumbing projects.
b. Types of Ear Protection:
- Earplugs: Disposable or reusable earplugs are a convenient option, offering effective noise reduction.
- Earmuffs: Earmuffs cover your ears completely, providing better noise reduction and comfort.
c. Proper Usage:
- Always wear ear protection when operating loud tools or machinery.
- Make sure your ear protection is properly fitted to maximize its effectiveness.
Having the right tools is the cornerstone of successful DIY plumbing for homeowners. The outlined toolkit, ranging from basic plumbing essentials to advanced instruments, empowers you to handle a wide array of plumbing tasks efficiently. However, your safety should never be compromised in the pursuit of home improvement. Safety glasses, gloves, and ear protection are essential components of your toolkit, providing the vital shield against potential hazards. They guard your vision, protect your hands, and preserve your hearing, ensuring that your plumbing projects are completed not only with skill but also with the utmost regard for your well-being. As you embark on your plumbing journey, remember to equip yourself with the right tools and safety equipment, and adhere to best practices. By doing so, you can confidently tackle a myriad of plumbing challenges while keeping your health and safety at the forefront of every endeavor.